Showing posts with label Battle Report. Show all posts

Sunday, May 10, 2026

Battle Report: Forward Operating Posts in Western France

The evening of 9 June 1944 settled uneasily over the Norman countryside, with the fading light casting long shadows across the hedgerows and ruined farms of western France, while in the distance the low rumble of artillery reminded everyone that the Allied invasion was still in its opening and most chaotic phase. Into this tense landscape advanced two forces with exactly the same orders and absolutely no knowledge of the other’s intentions. The men of the British 6th Airborne had been instructed to move into a nearby farming village and establish a forward operating base from which future operations could be coordinated inland. At almost the same moment, officers of the German 2nd Panzer Division had selected precisely the same cluster of farmhouses and crossroads for their own temporary headquarters as they attempted to stabilise the rapidly collapsing front. Neither side expected to encounter the other so quickly, and the result was an escalating clash fought among shattered barns, stone fences, and narrow lanes.

The battle opened cautiously, with both sides probing forward through the fields with the kind of careful discipline born from experienced troops who understood just how lethal a careless movement could be. The Germans gradually occupied the right flank of the battlefield, advancing through orchards and along the edges of the main road while their infantry kept close to hedgerows and trenches, while on the opposite side the British airborne troops pushed steadily up the left, using drainage ditches, low stone walls, and ruined farm structures for cover as they attempted to outflank the German advance before the village itself became fully contested.

Germans in the trenches

Early in the engagement, a German 20mm Flak gun was dragged into position overlooking the centre of the battlefield, its crew quickly traversing the weapon toward a farmhouse where reports indicated a British sniper team had taken position in the upper floor. The autocannon opened fire with a violent burst, shells hammering into the stone walls and blasting apart shutters and roof tiles in a storm of splinters and dust. Yet despite the terrifying display of firepower, the barrage proved surprisingly ineffective, with most of the rounds punching harmlessly through the building or detonating against already ruined masonry while the sniper himself remained concealed somewhere within the wrecked upper rooms.

On the German right flank, the battle began to intensify as a squad of Sturmpioneers advanced aggressively toward the British lines, weaving through shell holes and low hedges before finally taking shelter inside a bombed-out farmhouse dangerously close to the airborne positions. The Germans had advanced far enough that the sounds of shouted commands and rattling equipment could now clearly be heard by the British troops nearby, and for a brief moment it appeared that the pioneers might successfully establish a foothold that could unravel the entire British flank. One of the German troopers cautiously raised himself to peer through the shattered upper window and survey the ground ahead, but almost instantly the crack of a rifle echoed across the fields and he fell dead instantly as the concealed British sniper finally revealed his position.

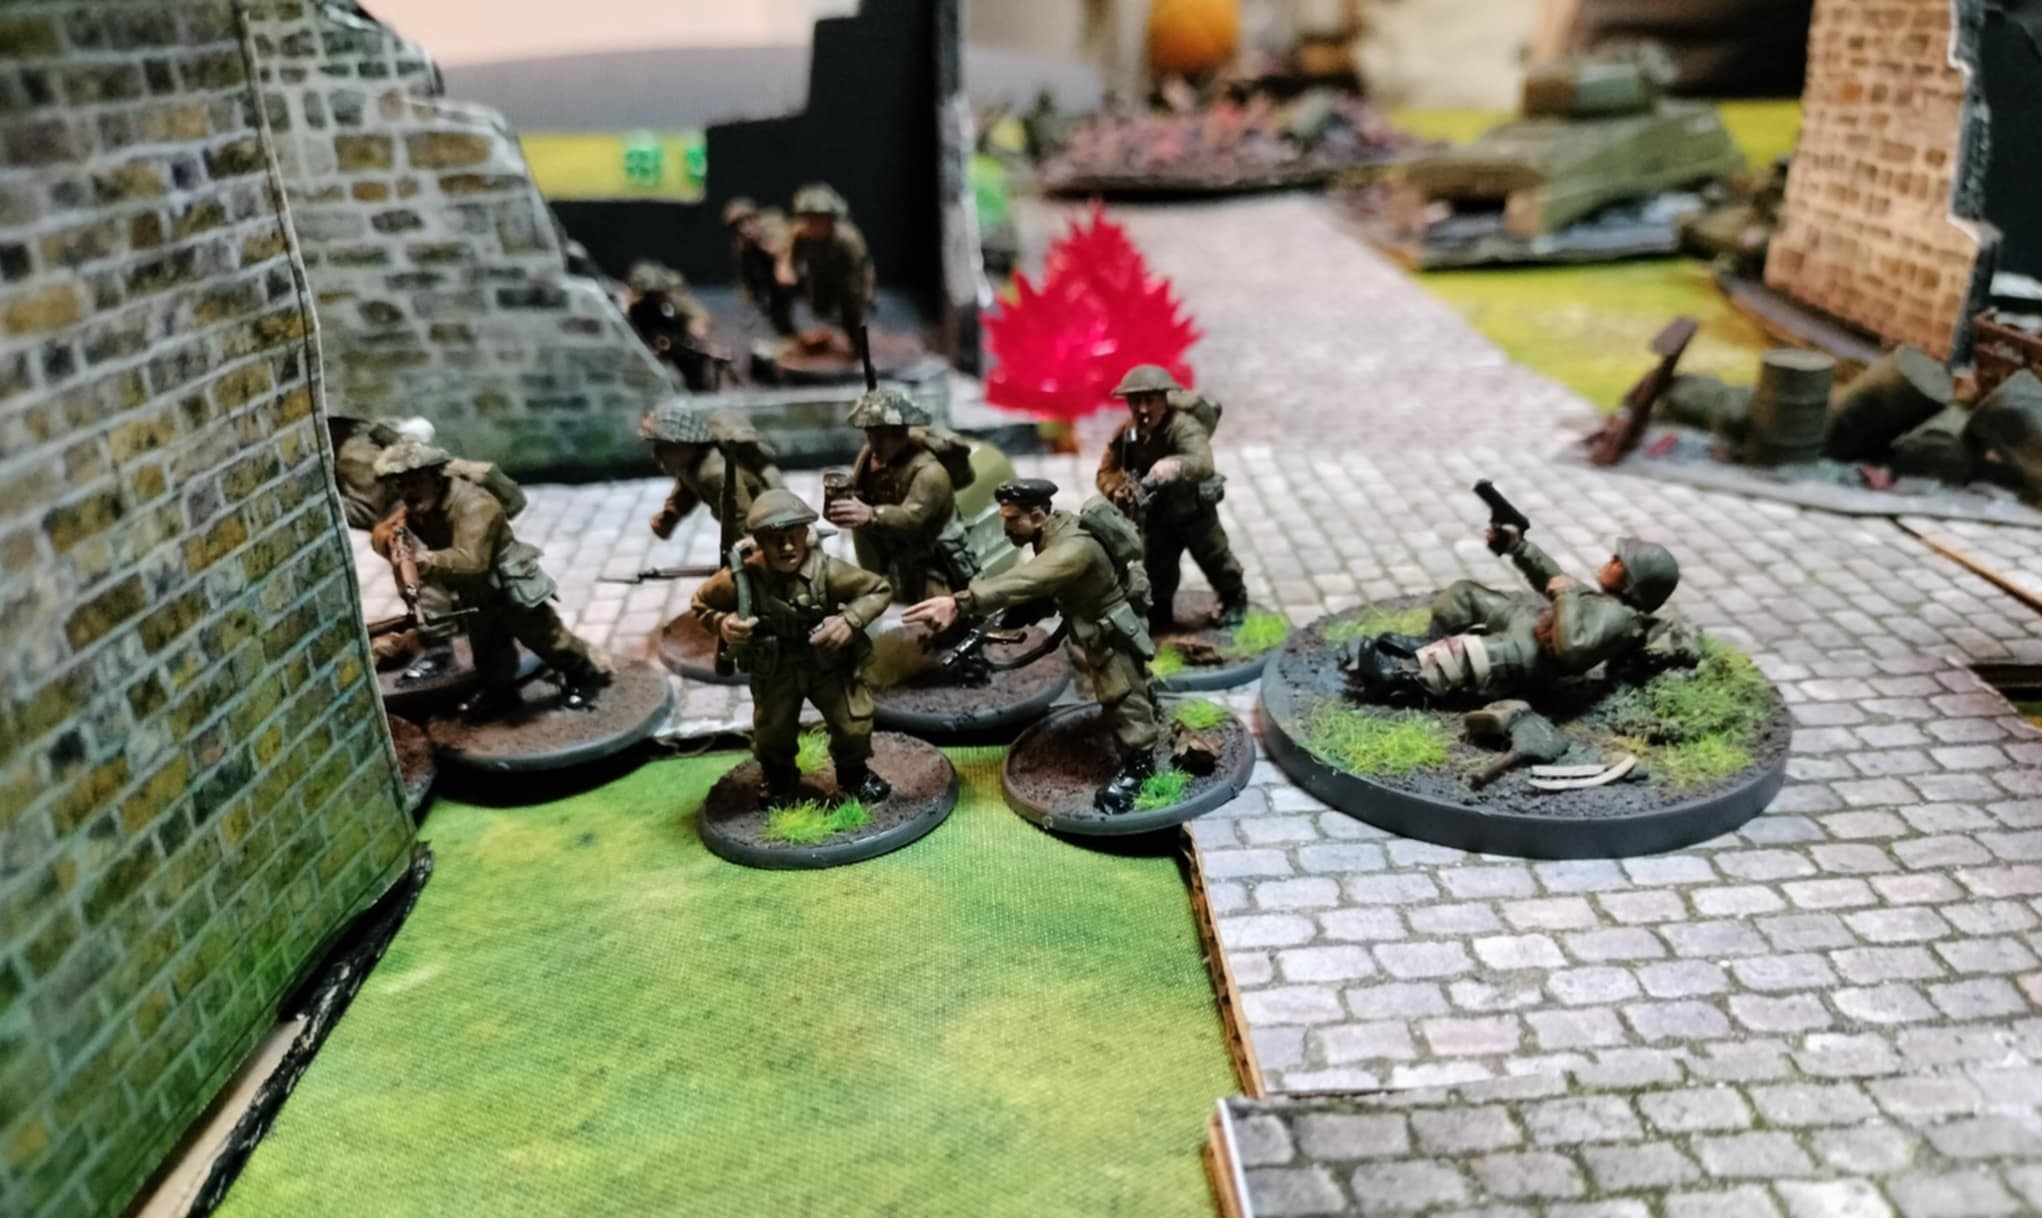
British advance into the road while taking cover

The effect on the Sturmpioneers was immediate and devastating. Certain that the sniper had them perfectly ranged, the Germans threw themselves to the floor and refused to expose themselves again, every broken window and gap in the walls suddenly seeming like a death sentence. Their hesitation proved fatal. Recognising the moment, British riflemen and Bren gunners surged forward with remarkable aggression, pouring concentrated fire into the farmhouse from multiple angles while grenades crashed through the shattered windows. Trapped, pinned, and too terrified of the sniper to properly return fire, the Sturmpioneers were systematically wiped out where they cowered in the rubble below. Within minutes the German advance on the right flank had collapsed completely, leaving the farmhouse filled only with smoke, dust, and dead pioneers.

Yet while success on the flank briefly raised British morale, disaster was simultaneously unfolding elsewhere along the line. Near the centre of the battlefield, the British airborne second lieutenant cautiously advanced toward the main road, attempting to coordinate the movement of several scattered squads whose progress had slowed amidst the confusion of the firefight. Keeping low behind a stone wall and moving carefully between gaps in the cover, he appeared reasonably protected from enemy fire. However, ahead of him near the edge of a forest, a German rifle squad had already established overlapping fields of fire with their MG34 and Kar98 rifles trained directly onto the road. A sudden burst of Spandau fire erupted across the battlefield, accompanied by disciplined rifle shots snapping overhead, and in the chaos a single stray bullet struck the British officer instantly, killing him before he could even collapse fully behind the wall.

The British leader shot 
down by the forest. 


The effect on the British command structure was catastrophic. With their lieutenant dead and communications already strained, confusion rapidly spread among the airborne troops. His adjutant, shaken by the sudden loss and incoming fire, abandoned the field entirely, while the sniper team that had earlier crippled the Sturmpioneers finally broke under the relentless suppressive fire of the German 20mm Flak gun, retreating from the ruined farmhouse as shells continued to tear chunks from the building around them. Nearby, another British squad occupying a cluster of farms waited desperately for instructions over the radio, but after hearing only silence and static they lost confidence in the situation entirely. Unsure whether to advance, retreat, or hold position, the men elected to stay down rather than risk moving into what they feared might already be a collapsing flank. In doing so, they surrendered the initiative at the most critical stage of the battle.

For a time the engagement settled into a tense stalemate, with both sides pinned behind cover and unwilling to risk a costly assault through the open ground separating the village from the surrounding fields. Rifle fire cracked intermittently through the evening air while wounded men called for medics from shattered buildings and roadside ditches. It was during this uncertain lull that the German lieutenant finally made the decision that would determine the battle.

Under a hail of bullets and against the advice of several of his men, the officer suddenly broke from cover and sprinted forward across the road toward a narrow fence line positioned barely sixty feet from the British-held sector of the village. Somehow surviving the storm of incoming fire, he threw himself behind the fence and immediately began shouting for his men to advance, declaring with complete confidence, “Here is where we set up our forward post!”

The position itself was dangerously exposed and far closer to their own line than most of the German high command would have preferred, yet the sheer audacity of the act had an electrifying effect on the exhausted troops around him. German infantry who moments earlier had been hesitant and pinned now surged forward to support the new position, bringing machine guns and rifle teams up behind the fence while others advanced into the nearby farm buildings. Across the battlefield, the leaderless British airborne troops watched the renewed German momentum with growing uncertainty. Without officers to coordinate a counterattack and with units increasingly isolated from one another, their resistance gradually began to crumble.

The spot the forward base was set up

As darkness approached, the British finally abandoned the village, withdrawing back through the hedgerows and leaving the crossroads and farmhouses in German hands. The men of the 2nd Panzer Division immediately began fortifying their newly won position, turning the shattered Norman village into a forward operating base exactly as they had been ordered to do only hours before.

For the Germans it was a hard-fought local victory, but for the British airborne troops the battle was merely a temporary setback. The village had been lost, but the fighting in Normandy had only just begun.

An awesome game of Bolt Action with the Germans eeking out a win by 1VP with the final dice of the game being a run order to move his 2nd Lieutenant up into the 1VP zone! Risky but decisive enough to get the W. The game had some awesome moments like my opponent rolling 3 6's in a row to kill my 2nd Leutenant (not including my failed cover save!!!). That really swung the game around but it quite literally came down to the last roll of the game to decide if it was going to be a draw or German victory. A real nail bitter!

So good to get the boys back on the table after the last few Stargrave games and looking forward to my next game with some new Temu scatter terrain!

Singing off,

Chewie

Sunday, February 8, 2026

Battle Report: The Battle for Maleme Airfield

Battle Report: Maleme Airfield, Crete – 20 May 1941

Dawn broke over Maleme beneath a hard, colourless sky, the air already heavy with the distant drone of aircraft engines as silk canopies blossomed above the olive groves and dry riverbeds surrounding the airfield, and within moments the quiet of the Cretan morning was shattered by rifle fire, shouted orders, and the sharp cracks of bullets snapping through the dust as the German airborne assault began.

The Paras begin to land 

The paratroopers landed in confusion, scattered by wind and enemy fire, and one unfortunate Fallschirmjäger squad drifted far from its comrades and descended directly into the sights of ANZAC defenders positioned on the nearby hills. As the men struggled free from their harnesses and gathered their weapons, accurate rifle and Bren gun fire tore into them, cutting them down almost as soon as their boots touched the ground. There was no chance to regroup or return effective fire, and within minutes the squad had been shot to pieces, their parachutes hanging motionless in the olive trees as grim markers of the price paid for landing in the wrong place.

Elsewhere on the battlefield, fortune favoured the attackers. The remaining German squads landed close together on the edge of the airfield, and despite taking casualties and suffering pins from determined ANZAC fire, their officers quickly imposed order on the chaos. Men were rallied, firing positions established, and disciplined volleys of rifle fire began to hammer the ANZAC trenches overlooking the runway. What had begun as a desperate scramble for survival rapidly turned into a coordinated German foothold, as overlapping fields of fire forced the defenders to keep their heads down and prevented them from exploiting the vulnerability of the landing troops.

From the hills, ANZAC artillery crews attempted to break this growing concentration, but despite repeated adjustments and urgent corrections shouted down the line, shell after shell fell wide of its mark, bursting harmlessly in open ground or overshooting the German positions entirely.  Recognising the opportunity, German troops began pushing forward in small, aggressive groups, advancing from crater to ditch and from stone wall to supply building, steadily expanding their control of the airfield perimeter.

The ANZAC guns on the hill were ineffective

Near the runway itself, the German assault gathered momentum as paratroopers stormed the supply buildings and hangars that dotted the airfield. It was at this moment, as the Germans consolidated their gains, that fresh gunfire erupted behind their lines when a small group of Cretan partisans emerged from cover and opened fire with whatever weapons they could muster. Their shooting was wild and undisciplined, driven more by defiance than training, and though they managed to force the Germans momentarily to ground, the Fallschirmjäger responded. Taking cover in a nearby crater offered the partisans only brief protection, and within moments methodical German fire swept the position, killing them to the last man and extinguishing this brief flare of resistance.

As the battle reached its most dangerous point, a ANZAC Universal Carrier surged forward in an attempt to disrupt the German advance, rattling past a concealed flamethrower team while its own fire proved largely ineffective. The flamethrower ignited, unleashing a roaring torrent of fire that engulfed the vehicle. The operator, frozen in terror and adrenaline, screamed as he held the trigger down, emptying the entire fuel canister in one continuous, horrific burst.

Flames engulf the carrier

With the airfield shrouded in smoke and dust, the decisive moment arrived as German paratroopers launched a determined assault on a ANZAC trench line guarding one side of the runway. Grenades exploded along the parapet, rifles cracked at point-blank range, and after a brief but savage struggle the trench was overwhelmed, forcing the surviving defenders to fall back. With this position taken, the Germans now held complete control of one side of Maleme airfield, and the balance of the battle shifted decisively in their favour.

The defenders are overwhelmed
At the same time, confusion began to spread through the Commonwealth command structure, as the local lieutenant received repeated and contradictory orders urging him to abandon the airfield and prepare instead for a seaborne landing expected elsewhere along the coast. Unaware that Maleme itself was the primary German objective, and faced with mounting pressure on his own front, he hesitated, his ability to command eroded by uncertainty and conflicting demands. Units delayed, orders went unheeded, and precious moments were lost as the defence faltered at the critical point of the engagement.

Although the ANZAC troops managed to hold onto the airfield for a short while longer through sheer determination, the momentum could not be stopped, and the Fallschirmjäger surged forward once more, pushing onto the open runway and securing it under fire. Flares signalled success as German control of Maleme was finally established, and the defenders began their withdrawal toward the hills, conceding the field at last.

As the firing died down and the smoke drifted away, transport aircraft appeared overhead, descending toward the captured runway with reinforcements and supplies, and it was clear to all who witnessed it that the battle for Maleme had decided far more than a single airfield. With its fall, the fate of Crete itself was sealed, and the island passed inexorably into German hands.


Another cracking game of bolt action! This was a very fun scenario with chaotic troop placement, limited cover and a clear objective to play for. As luck would have it I (the ANZACs) was convincingly defeated with a final score of 3 to 7. It was fun to play out this historic battle while reading Beevor's Crete and funny how the dice seemed to emulate history in the break down of command and the Germans seizing the day. Looking forward to our next game!

Signing off,

Chewie. 

Sunday, November 9, 2025

Battle Report: TheTreasures of War

 Battle Report: The Treasures of War

Western France, September 1944. British Army engage Wehrmacht forces in the small village of Cordonbleau. The British Objective is to recover priceless art stolen from the Louvre. The German Objective: Destroy the British ammunition depot and delay their advance toward the German border.

As dawn broke over the rolling fields of western France, the countryside erupted with the distant rattle of gunfire. Both sides advanced cautiously in a cat-and-mouse game across hedgerows, stone walls, and sunken lanes. British and German machine gunners set up on overwatch, scanning the distant terrain for movement. The tension was thick, each side probing for a weakness.

The British armored cars, their engines growling, pushed forward but were shockingly ineffective, their autocannon rounds pinging harmlessly off stone barns and plowed fields. In contrast, the German 20mm Flak gun roared to life, its tracer rounds cutting through the haze. Within moments, the British Vickers machine gun nest that had anchored the left flank was shredded under a hail of fire. Smoke rose from the cratered position as the flank began to buckle. 

The PIAT team creep towards the German position

Meanwhile, a British PIAT team crept closer to a farmhouse where German snipers had taken up position in the attic. Each movement was cautious, deliberate with the crack of rifle fire overhead a reminder of the danger lurking in the rafters. They sprung from their hiding spot and fired a shell into the farm house killing the sniper team. 

The Germans seized the initiative. A platoon of infantry, supported by grenadiers and machine gunners, surged forward along the left flank. Their boots pounded the earth as they stormed over a low ridge, firing wildly as they went. British riflemen from the farmhouses raked them with rifle and Bren fire, cutting down several, but still the Germans came on, driven by orders and desperation.

The British, meanwhile, hesitated in the woods on the right flank, unwilling to break cover and face the German machine gun that guarded the center. The hesitation proved costly  the enemy seized ground, and the British line began to fray under pressure.

The Germans surge down the left flank

As the Germans crested the trench line, the British mortar crew adjusted their sights. A thump echoed across the field — then another. The second shell landed squarely in the midst of the advancing Germans. The explosion tore through the assaulting squad, wiping them out to a man. The cheers from the British positions were short-lived, but morale surged the line had held, at least for the moment.

At the right side of the field, Captain Heinrich Battonberg, a British officer of dubious heritage, saw an opportunity. Grabbing his Sten gun, he charged forward, firing from the hip into the enemy line. The German Leutnant Otto Von Uberschnitznel's attendant fell, clutching his chest. The two leaders locked eyes and opened up with their submachine guns. Bullets tore through the air. When the echoes faded, Battonberg lay still in the mud, his Sten fallen beside him. Uberschnitznel, wounded but standing, gave a grim nod to his fallen foe before rallying his men again.

The Germans claim the trench only to be instantly wiped out by mortar fire.
The British mortar roared once more, and another direct hit ripped into the German position, scattering the survivors and leaving smoldering wreckage in its wake. Both sides, bloodied and exhausted, began to pull back.

The stolen art remained in German hands  secured in the back of a halftrack rumbling toward the rear. The British ammunition depot still stood untouched, though its defenders had paid dearly for it. The British had held the line — barely — but as dusk settled, it was clear they had come off worse, their wounded filling the woods and trenches where the day’s battle had begun.


A cracking game of bolt action and the first game of 3rd edition for my opponent (who commanded the British forces). The mission we played was demolition with a meeting engagement though neither side was able to destroy the opponents base. Before the game started we decided to add a second victory point mission (1 point for every 2 enemy units destroyed) in the case of tie breakers and it ended with a German victory by 1 point! A great game and I was reminded how easy it is to get new people into playing the game with the simple rules of the game, especially when compared to more granular games like Kill Team which my opponent and I also play together. 

Looking forward to many more games in the future (and hopefully I remember to take more photos!) and a small update about some terrain I'm making soon!

Signing out,

Chewie


Sunday, October 5, 2025

Battle report: Trench Warfare

The motorbike surges forward
March 1945 -  The early morning mist clung to the broken ground between the two trench systems in Western Germany. A battered expanse of craters, wire, and shattered timber separated the Germans and British — both intent on seizing the other’s line in a grim echo of the Great War. 

The battle began with artillery raining down on both sides, causing casualties and pinning many of the units hunkered down in their trenches. The quiet after the barrage was interupted with the roar of engines as an SS motorbike burst from the German line, racing across no man’s land like a streak of lightning. The bike skidded to a halt almost point-blank before a British rifle squad and unleashed its MG fire. The sharp burst of rounds cut down men instantly, sending others diving for cover in panic.

The flamethrower is ineffective against the tank
But the British recovered fast. Brens, rifles, and even the distant cling of the PIAT fired in retaliation. At last, a direct hit from the PIAT sent the motorbike tumbling into a plume of black smoke and flame. The men cheered — but the cost was high. Nearly every gun on the British line had fired at the speeding menace, leaving their right flank dangerously exposed.


Seeing an opening, a German flamethrower team surged forward, darting between shell holes toward the British Stuart light tank that guarded the center. The operator raised his weapon, loosed a gout of flame that sputtered weakly against the Stuart’s armor. Before he could try again, the fuel tank coughed dry. The team froze in horror. The Stuart’s turret swung toward them, its machine gun chattering. When the smoke cleared, nothing of the flamethrower team remained but scorched earth.

SS troops are struck by the mortar shells raining on them 
The failed flamethrower assault didn’t slow the SS fanatics. With chilling discipline, they surged forward, supported by a Panzer II rattling up behind them. The light tank’s autocannon hammered round after round into the British assault wave trying to cross no man’s land. Shells burst among them, shredding the momentum of the attack.

Pinned and bloodied, the British push faltered. The SS stormed the trenches, grenades flying and bayonets fixed. Close-quarters shooting was brutal, fast, and decisive. Within minutes, the Union Jack that had marked the British line was trampled into the mud. The surviving Tommies, leaderless and reeling, began to fall back toward their reserves.

The Germans storm the trench and capture the line
By late afternoon, the smoke had settled. The once-empty no man’s land was now strewn with the dead and dying. The SS held both trench lines, their peadot uniforms stained with mud and blood. A lone British officer called for a withdrawal — their attempt to seize the enemy trenches had failed.

For the Germans, it was a hard-fought victory, earned through aggression, coordination, and sheer brutality. For the British, it was a bitter defeat — a reminder that even in 1945, some parts of the war could still look hauntingly like 1915.


Another GREAT game of bolt action 3rd edition. The game was extremely swingy with the British looking like they had lost by turn 2 but then reclaiming momentum to only be defeated by the Germans capturing a trench line leaving a final score of 4-2 German way. As usual the dice decided to make the story with many morale checks failed, missed shots and hot rolling swinging the combat. One thing we decided on was that for the future we will re-introduce the 'small teams' rule to give teams (that begin the battle) of 2 or less a -1 to be hit. As it is, it seems way too easy to shoot down these smaller teams than it used to be in 2nd edition. We'll see how it goes but I can't imagine it will be too broken!

 Looking forward to my next game and trying out some new toys for both sides.

Signing out,

Chewie. 


Friday, June 27, 2025

Battle Report: Saving Private Damon

Autumn 1944 in a shattered Dutch town. British Army forces are tasked with extracting a wounded paratrooper who holds crucial intelligence on upcoming German counter-offensives. The SS have moved into the village ruins to capture or kill him. Time is running out.

The Vickers set up in the crater.

The battle opened under a leaden sky. British infantry crept into position while a Vickers machine gun team set up in a smoldering shell crater overlooking the town's central avenue — the paratrooper was believed to be wounded and positioned down the road. As the Vickers team adjusted their sights, a Kubelwagen sped into the battle and fired from the far side of town. The first burst tore through the crater’s edge, mowing down the team. Only one shaken private survived, his loader crumpled beside him.

Down the main street, a British 6-pounder anti-tank gun was wheeled into position by a sweating crew. Its barrel locked down the rubble-strewn road — guarding the paratrooper’s last known position. Then came the low rumble of tires and armored plates. A Humber Armored Car rolled forward, firing a shot at the Kubelwagen that had pinned the Vickers team. The round smashed into a wall just wide of the mark, kicking up dust but leaving the vehicle intact.

As the firefight escalated, SS and British troops exchanged fire with varying levels of success. The buildings provided cover British officers radioed for an artillery strike, coordinates already pre-sighted onto the German-occupied buildings. But word came back: the artillery battery was engaged with fighting elsewhere on the front — no support was coming for this battle. The mission now depended on raw courage.
The British make contact with the Para!


Panzer IV crashing through the rubble
As the crack of rifles and the bark of machine guns echoed through the ruined village, Lieutenant Langerton watched his section hesitate in the open, pinned down by crossfire. The wounded paratrooper lay only yards away, slumped against a wall amid shattered bricks and tangled wire. Realizing the urgency, 
Langerton leapt from cover and sprinted into the street, but as a 20mm Flak shell screamed overhead and exploded nearby, the force of it knocked Langerton  down. Dust filled his lungs, and terror gripped his chest like ice. His voice caught. His courage faltered. He threw himself to the ground, trembling, his orders lost to the din. His men, watching their officer paralyzed with fear, wavered—until Sergeant Whitlow barked a curse, rallied the section with a growl of resolve, and charged into the firestorm himself, picking up where Langerton could not.

With the Germans repositioning, the British infantry squad sprinted down the avenue, bullets buzzing past like angry wasps. A 20mm Flak gun barked from a nearby woods. LMGs and rifles opened up from shattered windows. Bodies dropped left and right — only Sergeant Whitlow, bloodied and limping, reached the collapsed building where the paratrooper lay moaning in the dust.Without hesitation, the sergeant threw the wounded man over his shoulder and sprinted back through hellfire. Germans fired wildly, panic setting in as they realized their prize was slipping away.

The lone Sergeant Whitlow makes it back to the Bren Carrier
A Panzer IV lumbered into view, its crew a ragged mix of inexperienced Ostfront conscripts, hastily pressed into service. The turret swiveled toward the fleeing men. Shells clanged as the crew fumbled to load and fire — but every shot missed. With smoke and chaos all around, the Bren Carrier roared to life, its engine choking through dust. The sergeant threw the paratrooper in and vaulted aboard just as the vehicle lurched into motion. Bullets pinged off the hull as it sped away, carrying its precious cargo to safety.

 The British extracted the paratrooper. The intelligence was recovered. The Germans had thrown everything they had into the fight — but their panic, inexperience, and lack of coordination cost them dearly.


Another great game of Bolt Action! This was our second game with the 3rd edition rules and went quite well. I think the rules are pretty good though shooting is a lot deadlier now, with small teams being quite easy to pin down and eliminate even when in buildings or behind cover, something which was much harder in 3rd edition. As is the case with bolt action, there was some amazing moments told by the dice such as the British officer making a snap to order to essentially win the game only to roll 2 6's on the order test and go down instead!! As well the artillery barrage never arriving despite the 2 dice roll thanks to the British special rule!! 

As always, looking forward to the next game.

Signing out,

Chewie. 


Friday, April 4, 2025

Battle Report: The Airborne Retreat

Monday 25th September 1944. British Airborne forces make their final stand and desperate retreat across the Rhine as Operation Market Garden unravels.  

The PIAT team sneaking up on the Puma.

The battle opened with a crack of resolve from the battered British Airborne. A sleek German Puma rumbled forward into the outskirts of Arnhem, its turret scanning for targets—too late.
From the ruins of a collapsed pharmacy, a PIAT team fired at point-blank range. The shaped charge struck home, ripping through the side armor and sending the vehicle up in a column of smoke and flame. Cheers erupted from the British foxholes. Moments later, a German flamethrower team sprinted across an open field toward the woodland near the church. But the fields had eyes—their movement triggered an ambush from a Vickers MG team. Caught in the open, the flame troopers never made it. The opening turns were a masterclass in British defensive tactics. But it wouldn’t last.

Major Ellis is cut down in the street.
The Germans struck back, advancing through the bombed-out streets of Arnhem. Houses filled with British paratroopers exchanged fire with Heer Grenadiers, the walls shaking with each burst of gunfire.

From a ruined farm house, a German sniper team pinned the men of the 2nd Platoon in their hiding place. To break their shock, Major Ellis ran across the open street, shouting at them to rally—
—but the paratroopers stayed frozen, and the hesitation proved fatal German grenadiers stormed the house, killing the machine gunners on the upper floor. Trapped and exposed in the open, Major Ellis turned to run—but it was too late. A Hanomag screeched to a halt, and German troops leapt out, their rifles finding their mark. The Major fell in the street. The British were now leaderless. 

Crackling over the field radios came the order to retreat - Operation market Garden was a failure! A British artillery barrage, called in by a spotter, came crashing down on the Germans. One entire Grenadier squad was vaporized, their position now a scorched crater. But not all the British would make it. In a house close to the river, 2nd Platoon was further pinned by the very barrage meant to save them. No way to reach the river—they were stranded.

The airborne scramble to retreat

The retreat began under fire. British squads fell back in good order, leapfrogging from cover to cover but the Germans pursued with unrelenting speed. A British jeep, packed with wounded, attempted to reach the crossing—but a Kubelwagen’s MG42 stitched across the road, shattering its wheels. The jeep skidded into a wall, immobilized. Sensing opportunity, Von Schnitzel, the German commander, mounted his Hanomag and thundered down the road in hot pursuit. The Germans surged forward, pressing the crumbling flank and securing a winning position.


 In the final moments of the battle small groups of paratroopers slipped away from the battle lines and began their retreat across the Rhine into safe territory. However, some troops were left behind with no choice but to surrender to the Germans... Operation Market Garden had come to a conclusion.


An absolute cracker game of bolt action to finish off our campaign. The scenario was actually very fun and there was some really swingy moments that looked like either side was about to steal the win, however, in the end the final points were a draw! This concludes the operation market Garden Campaign and our final game of 2nd edition. It's been an excellent campaign and an absolute blast to play through, very much looking forward to our next one!

Signing out,

Chewie


Friday, January 31, 2025

Battle Report: German attack on the Oosterbreek Perimeter

Bolt Action Battle Report: German attack on the Oosterbreek Perimeter

A Stug III leads the assault into the perimeter.
The British 1st Airborne Division had been holding the Oosterbeek perimeter for days, battered, hungry, and desperately low on ammunition. Captain McGregor, a veteran leader, moved between the makeshift strongpoints, inspiring his men to hold firm against the coming storm. Across the fields, the men of the SS Panzer Corps prepared for another push, knowing that time was running out—XXX Corps would arrive soon, and if they failed to crush the paratroopers now, they might lose their chance forever.

Caught alone in the street - McGreggor is cut down!
 

The attack started with an earth-shattering roar as tank shells crashed into the buildings, sending debris and dust cascading down onto the dug-in British defenders. As the Germans advanced, the paratroopers fired wildly from windows and foxholes, cutting down the first wave of attackers. But the sheer weight of fire was overwhelming, and the defenders knew they couldn’t hold out forever.

From a half-collapsed rooftop, a British sniper took careful aim and fired, pinning down a squad of SS fanatics. Meanwhile, Polish artillery from across the Arnhem River let loose, hammering the advancing Germans. However, with the battle so close, some British soldiers were shaken by the near-friendly fire. Captain McGregor dashed across the broken street, shouting orders and urging his men to stand fast. Just as he reached the cover of another house, an SS Leutnant von Schnitzel leveled his StG44 and fired a merciless burst. McGregor staggered as bullets tore through him, crumpling to the ground. His men, already on the brink, felt the loss like a hammer blow—but they gritted their teeth and fought on.

Partisans charge the SS Leutnant!

Elsewhere, a squad of paratroopers rushed into a building, seeking cover—only to find themselves face-to-face with a group of exhausted but hardened German grenadiers. The room exploded in a wicked burst of gunfire, and within seconds, the British troopers lay dead, their bodies slumped against the walls.

Suddenly, from the basement of a ruined house, a small group of Dutch partisans emerged, wielding old rifles and makeshift weapons. Their eyes burned with vengeance as they charged straight for the SS Leutnant, dragging him into a brutal melee. The fight was short and vicious—the officer was beaten down, his body left in the street. But the partisans' victory was fleeting, as a nearby MG42 squad cut them down moments later.

At the height of the fighting, a German mortar team dialed in on the British machine gun nest, which had been stubbornly holding a garden on the outskirts of town. A single shell screamed down from the sky and landed dead-on—when the dust settled, nothing remained of the MG team. The British line wavered; they were on the brink.

A direct hit on the MG team in the garden!

Both sides were exhausted, their ranks thinned, their ammunition running dangerously low. Though the Germans had failed to break through completely, they had inflicted a mortal wound on the British defense. With Captain McGregor dead and the machine gun positions neutralized, the paratroopers knew their time in Oosterbeek was running out.

As night fell, the SS forces pulled back to regroup, preparing for another attack. But the British knew they wouldn’t last much longer. The battle had ended in a draw—but for the British paratroopers, it was a battle they could not afford to fight again.


An absolutely cracking game of bolt action! The end result was 6 points each side and our first draw in a game. It literally came down to the last few dice rolls from the German side to see if they could kill the last few paratroopers holding one of the houses. Much like real life, it was a brutal, hard-fought engagement, and though the British held the perimeter for now, the writing was on the wall. Operation Market Garden was nearing its bitter end!
Signing off

Chewie

Friday, January 10, 2025

Battle Report: 107th Panzer Division Assault on the Son Bridge


Bolt Action Battle Report: The 107th Panzer Division Assault on Son Bridge
September 20th, 1944

The fields and roads surrounding the Son Bridge were eerily quiet as dawn broke. Dug into defensive positions on the northern side of the bridge, the American paratroopers of the 101st Airborne Division braced for the inevitable assault. Across the canal, the rumble of engines and clatter of tank tracks echoed ominously—elements of the 107th Panzer Brigade were on the move. This would be a fierce contest for control of this crucial crossing in Operation Market Garden.

The German Panzers assault

The German armor surged forward, a mix of Panzer IVs and StuG IIIs leading the charge, flanked by halftracks brimming with Panzergrenadiers. Shells and bullets rained down on the American positions, but the paratroopers held firm in their dugouts, trenches, and bunkers. Thanks to their prepared defenses, the withering German fire proved ineffective, with ricochets and explosions sending dirt and debris flying but failing to dislodge the defenders.

The Americans responded with disciplined small-arms fire and sporadic bazooka shots, keeping the advancing German forces at bay.

As the pressure mounted, a US radio operator frantically called for air support. Minutes later, the distant roar of engines grew louder, and a P-47 Thunderbolt swooped down through the clouds. The fighter-bomber released its payload directly onto a Panzer IV attempting to cross the riverbank. The explosion disabled the tank’s tracks, leaving it immobilized on the water’s edge. Despite being a sitting duck, the Panzer IV’s turret continued to rotate, spitting shells at the Americans in the trenches.

The Americans under fire in their positions

Seizing their moment, a squad of Panzergrenadiers charged the newly constructed Bailey bridge, braving torrents of gunfire from the Americans and even a strafing run from the P-47. Reaching the far side, the Germans stormed into a trench occupied by a US bazooka team. A young private, armed only with his bazooka and raw determination, fought off the charging grenadiers in brutal hand-to-hand combat. Swinging the empty tube like a club, he dispatched one soldier after another, forcing the surviving Germans to flee in disarray. Bloodied but unbowed, the private held his ground, his actions likened to a rock standing unbroken against a crashing wave.

The Stug is knocked out by XXX corps armor.
Meanwhile, a German flamethrower team miraculously survived waves of American fire. Dodging machine gun bursts, tank shells, and rifle fire, they managed to find cover just short of a critical bunker housing several American paratroopers. The German commander barked the order to light the flame and eliminate the defenders inside. But as the operator raised the flamethrower, his courage failed. The sight of the gun barrels trained on his position, coupled with the horrors of war, proved too much. The young soldier froze, refusing to carry out the attack. The German officer shouted in frustration, but it was too late—the opportunity had passed.

The Americans hold the bridge!

As the battle reached its crescendo, the roar of British engines signaled the arrival of XXX Corps. A Sherman tank platoon emerged behind the German lines, having broken through to reinforce the Americans. The Sherman, led by an ace crew, made quick work of the German armor. The StuG III erupted in flames, its crew scrambling for safety. The immobilized Panzer IV on the riverbank was finally silenced by a well-placed round. The German halftracks, caught in the open, were shredded by the tanks withering fire.

With their armor destroyed and reinforcements overwhelmed, the German assault faltered. Colonel Von Schnitzel, realizing the day was lost, reluctantly gave the order to retreat. His troops scattered back across the fields, leaving the battered but victorious paratroopers to emerge from their bunkers and trenches.

The Americans regrouped on the Bailey bridge, their battered uniforms caked in mud and soot. As the last of the German forces retreated into the distance, a cheer erupted among the paratroopers. They had held the bridge against overwhelming odds, ensuring the advance of Allied forces deeper into
occupied Holland!

Another great game of bolt action with a convincing allied win! The game played out much like the historical events of the Son Bridge assault. The 107th Panzer Brigade made a valiant attempt to seize the crossing, but the arrival of British XXX Corps turned the tide. The combination of American grit and British firepower proved too much for the German attackers. There's something fun about playing a historical battle out and having it resolve much the way that it did on the actual day in history!


Looking forward to our next game of this campaign where the British paratroopers in Arnhem must hold on against all odds.

Signing out,

Chewie

Friday, November 8, 2024

Battle Report: Crossing the Waal

 Battle Report: Crossing the Waal

Operation Market Garden, September 20th, 1944

“Hold your nerve, boys! We’ve got to take that bridge!” shouted  Sergeant Leeroy Jenkins from the 504th Parachute Infantry Regiment as the rubber boats pushed off into the cold, churning waters of the Waal River. Bullets hissed and snapped over the river like deadly rain, and shells from German mortars crashed into the water, sending towering geysers skyward.

The Americans advance up the river bank!
The American paratroopers strained at their paddles, using rifle butts and even helmets to propel their fragile boats. The crossing was chaos—boats shattered, men thrown into the water—but the Americans pressed on. Finally, the first wave hit the northern riverbank under a storm of German machine gun fire.

As the Americans leaped out of the boats and scrambled up the embankment, German defenders opened fire from their entrenched positions. Machine gun nests sprayed deadly bursts, and grenades were lobbed down onto the advancing paratroopers. Despite the withering fire, the Americans pushed through, determined to establish a foothold.

Fierce melee on the embankment.
The air was filled with shouted orders and the screams of the wounded. In a brutal melee atop the riverbank, the two sides clashed with bayonets, rifle butts, and knives. Paratroopers fought like demons, and the Germans, though entrenched, were unrelenting. In the chaos, the German Leutnant Heinrich Von Schnitzel  was bayoneted by a fierce American corporal. His death sent a ripple of uncertainty through the German ranks—their leadership had been decapitated.

Among the American assault was Private Wilson, carrying a flamethrower. His squad had managed to push up close to a German trench, where enemy riflemen were stubbornly holding their position. Wilson dashed forward, his flamethrower aimed and ready. But when he pulled the trigger, instead of a torrent of fire, only a pitiful hiss came out. The tank had been punctured by enemy fire during the crossing, and now the weapon was useless—filled with nothing but water. Cursing, Wilson quickly discarded the flamethrower and drew his sidearm. With his M1911 pistol, he fired at the trench, buying time for his squadmates to close in and lob grenades.

The bazooka destroys the MG team in the crater

On another flank, a bazooka team managed to crest the riverbank under heavy fire. Spotting the muzzle flashes of an MG42 tearing into their comrades, the loader slammed a rocket into the tube, and the gunner steadied his aim. A loud whoosh echoed as the bazooka fired, the rocket screaming toward its target. The projectile hit dead center in a crater housing the German MG team. A deafening explosion followed, silencing the machine gun with finality. Smoke and debris filled the air, but the cost was high—the bazooka team was quickly picked off by precise German rifle fire before they could retreat to cover. Their sacrifice, however, had cleared the way for more Americans to land and push forward.

Amidst the growing battle, German reinforcements arrived—a Kubelwagen, its mounted MG34 spraying bullets wildly, came racing onto the field. The vehicle sped across the American line of advance, its machine gun rattling furiously. Though the gunfire forced some paratroopers to dive for cover, it was largely ineffective. In return, the Americans opened up with rifle fire. The Kubelwagen swerved and zigzagged to avoid being hit, its tires kicking up dirt and debris. For now, the small German force managed to buy precious time for the defenders.

The bridge is destroyed by German engineers!

Despite heavy losses, wave after wave of American paratroopers continued to land on the riverbank. They pushed deeper into the German positions, driving the enemy back inch by bloody inch. Victory seemed within reach—the Americans were about to take the final stretch of ground leading to Nijmegen Bridge.

But suddenly, a thunderous explosion shook the battlefield. A massive cloud of dust and smoke erupted from the bridge as the Germans’ final act of defiance came to fruition. Their engineers had succeeded in setting off the demolition charges, and the bridge, the vital link to Nijmegen, came crashing down into the Waal.

General Gavin, watching through binoculars from the southern bank, let out a cry of shock. The bridge was gone, and with it, the Allies’ hope of a swift victory. Though the Americans had fought valiantly and crossed the Waal under impossible odds, their efforts now seemed futile.

As the ruins of the bridge smoldered in the river, the realization set in—Operation Market Garden was faltering. Was this the beginning of the end?

This was an absolute cracker of a game for bolt action - at first my opponent and I were skeptical if the Americans would even make it off the river bank but some lucky rolls (or unlucky!) soon had the game evenly matched and in the balance. It was an extremely close game that literally came down to the final roll of the dice on turn 6 to see if the demolition charges went off (a roll of a 1 followed by a 1-4!!!). What an amazing end to a nail bitter game!

Looking forward to our next scenario when the German Panzers assault the Son Bridge!

Signing out,

Chewie

Saturday, August 24, 2024

Battle Report: The Battle for Nijmegan

The early morning mist clung to the streets of Nijmegen as the American paratroopers moved into position. High above the city, an American machine gun team had set up in the bell tower of an ancient church, its Gothic spires giving them a clear line of sight over the city. The team knew that this position was vital; they could see the entire German advance from here.

Paratroopers overlooking the city streets

As the German forces moved into position, setting up in the abandoned houses which now lay bombed out on rubble filled streets. A German sniper, expertly hidden in the bombed-out remains of a nearby building, began picking off the gunners. The Americans tried to return fire, but each time the gunner popped up to fire a burst, the sniper’s shots forced them to duck back down. The Germans then brought in a mortar, sending shells crashing into the church tower. Each explosion shook the tower, raining dust and debris on the beleaguered Americans, who found themselves trapped and unable to move.

On the ground, the fighting was equally intense. A squad of German mortar men had taken up position in the hedges on the outskirts of town, their shells falling with deadly precision on the advancing Americans.

The sounds of battle drew the attention of a group of Dutch partisans who had been waiting for their chance to strike back at the occupiers. In a dark, dank basement beneath a crumbling house, they had been listening to the battle above, waiting for the right moment. When they heard the sharp crack of a sniper’s rifle from the upper floors, they knew it was time to act. Armed with makeshift weapons – a mix of clubs, hammers, and a few old rifles – they quietly ascended the stairs. Bursting into the sniper's nest, they found a lone German soldier, his rifle trained on the church tower. The partisans overwhelmed him in seconds, clubbing him to death in a flurry of blows. The sniper’s body was dragged into the street, a grim symbol of the Dutch resistance’s determination to fight back.

Meanwhile, the battle for the bridge raged on. A Sherman tank from XXX corps arrived and began to lead the final assault, its massive turret swiveling to and fro as it pushed down the narrow streets. But lurking in the shadows was a lone German soldier armed with a Panzerfaust, determined to stop the

None of the Panzershrek shots found their mark!

Allied advance.

With a steely resolve, the German soldier took aim and fired his first rocket. It streaked toward the Sherman but missed, slamming into a nearby wall and sending a cloud of dust and debris into the air. The Sherman pressed on, its machine guns blazing, but the German soldier was not deterred. He reloaded and fired again, only for the second rocket to go wide and explode harmlessly in an open square. Undeterred, the German soldier prepared a third Panzerfaust. Just as he was about to fire, the Sherman’s main gun roared to life. The explosive shell hit the German’s position, sending a shower of rubble flying. When the smoke cleared, the Sherman was still moving forward, unscathed.

Meanwhile, in a rare lapse of tactical judgment, a group of German soilders charged from their position of a bomb crater into a unit of veteran paratroopers. The Americans raised their rifles and shot the advancing Germans to pieces before counter assaulting and occupying the same crater from whence they came.

The paratroopers capture the crater

As the battle seemed to reach a crescendo, the roar of engines echoed across the battlefield. It was the sound that the paratroopers had been waiting for – the tanks of XXX Corps had arrived. Led by the renowned Irish Guards, the British armored columns smashed through the German defenses on the outskirts of Nijmegen and pressed toward the city center. It was then that Corporal Hensley, spotting an opportunity and took matters into his own hands. He revved up the engine of a nearby Jeep, its machine gun mounted and ready. Without hesitation, he drove straight into the crossfire, bullets whizzing past as he charged toward the German mortar position. The Germans frantically tried to reload, but they were too slow. The Jeep skidded to a halt just meters from their position, and the .50 caliber machine gun roared to life. In a matter of seconds, the German mortar crew was mowed down, silencing their deadly fire.

The Brits arrive at the city outskirts
The sight of the British tanks rolling into Nijmegen bolstered the weary paratroopers. With renewed vigor, they coordinated their efforts with the advancing tanks, tightening the noose around the remaining German defenders. Kampfgruppe Henke, despite their best efforts, found themselves increasingly outmatched and outgunned.

With the British armor providing overwhelming firepower and the American paratroopers pressing the attack, the German defense began to crumble. The streets of Nijmegen were filled with the sounds of battle – the rumble of tanks, the crack of rifles, and the thud of artillery. But the coordinated efforts of the Allies slowly but surely pushed the Germans back.

As the last remnants of Kampfgruppe Henke retreated across the bridge, the battle for Nijmegen came to a close. As the smoke began to clear, the paratroopers and British tank crews let out a cheer – a victory cry that echoed across the ruined city. They had won the day, but the road to Arnhem still lay ahead, and with it, more battles yet to come.

Friday, June 14, 2024

Battle Report: Grabner's Assault on Arnhem Bridge

The British open fire on the approaching Germans
The morning sun cast long shadows over the battle-scarred town of Arnhem. The British Paratroopers from 1st Airborne Division lay in wait within the damaged buildings, their eyes trained on the bridge that was key to the entire operation. The once picturesque town had turned into a formidable stronghold, with every window and ruin potentially hiding a defender ready to unleash fury on the approaching German forces.

The calm before the storm was shattered as the rumble of German vehicles echoed across the bridge. The British soldiers tightened their grips on their weapons, nerves taut. As the first German units began to cross, the signal was given. A hail of fire erupted from the British positions, sending bullets and shells raining down upon the advancing troops.

Chaos on the bridge!
German soldiers found themselves pinned down by the relentless and precise fire. The sound of gunfire was deafening, and the air was thick with smoke and the acrid smell of cordite. Despite their initial shock, the Germans tried to return fire, but their attempts were largely ineffective against the well-concealed British positions.

Amidst the chaos, Lance corporal Harry Styles of the british flamethrower team saw an opportunity. Harry and his assistant dashed from their cover, their flamethrower aimed at a German Hanomag half-track. The intent was to turn the vehicle into a blazing inferno, but in their haste, the flames went wide, missing the target. The Germans, now fully aware of the immediate threat, swiftly retaliated. A volley of bullets cut down the brave flamethrower team before they could retreat to safety. 

The Sd.Kfz. 234 fires onto the British 6pdr
German vehicles raced across the bridge and began swerving wildly through the streets past the paratrooper with the intent of making a break through the city. In anticipation the British 6pdr gun spun around to pick off the vehicles as they roared across the fields skirting Arnhem. Meanwhile, down the street, a German Puma armored car had found its mark. The Puma's pintle mounted machine gun roared to life, sending a hail of bullets down the street towards the British 6pdr anti-tank gun crew. The fire was near enough to send debris flying and pinned the gun crew, preventing them from returning effective fire. 


In a desperate bid to break through, a German Kubelwagen made a mad dash for safety. The small vehicle sped across the open field, drawing the attention of the British Vickers MG team. The machine gun opened up, its staccato fire tearing into the Kubelwagen's engine. The vehicle sputtered and came to a halt, smoke billowing from under the hood. The German crew, realising their situation was untenable, abandoned the immobilised vehicle and sought cover.


The wagon immobilised inches from the table edge.

Grabner's assault had been fierce but ultimately unsuccessful. The British paratroopers' determination and tactical acumen had proven too much for the Germans. In the chaos of the battle, SS-Hauptsturmführer Viktor Grabner was lost. While the British presumed him dead on the bridge amidst the wreckage of his assault, the uncertainty lingered—no body had been confirmed, leaving a shadow of doubt over his fate. Nevertheless, Arnhem bridge, a crucial link in Operation Market Garden, remained a bastion of resistance, thanks to the bravery and sacrifice of the men of the 1st Airborne Division.


Another cracking game of bolt action with an interesting scenario from the Operation Market Garden Campaign book. While it was a British victory the game was much closer than it seemed with the Germans poised to get the Kubbel, Motorbike and Puma off the table in the next turn (thus sealing a victory!) given the British could not immobilise the car. Looking forward to our next battle for the campaign where we will play out the capture of Nijmegen! 

Battle Report: Forward Operating Posts in Western France

The evening of 9 June 1944 settled uneasily over the Norman countryside, with the fading light casting long shadows across the hedgerows and...