Showing posts with label Scenario. Show all posts

Saturday, January 31, 2026

Scenario: The Battle for Maleme Airfield

I've recently begun reading Antony Beevor's "Crete" and as usual it's an endless source of inspiration for bolt action games and units.


The source of inspiration!

During the course of the battle the German capture of the Maleme Airfield can be considered one of the, if not the, decisive moments of the battle. Defended by ANZAC troops the airfield was crucial for the Germans to bring in much needed supplies and support the Fallschirmjager in capturing the island. I thought it would be fun to replay this key battle and see if we could rewrite history and pull of an allied victory. It was also a great opportunity to field some ANZACs on the table (yeah the boys). 

Maleme Airfield, Crete — 20 May 1941

The battle map for the assault on Maleme Airfield

SCENARIO

At dawn on 20 May 1941, German Fallschirmjäger descended onto Crete in history’s first large-scale airborne invasion. At Maleme Airfield, scattered paratroopers landed under fire, isolated and short of heavy weapons. Opposing them, exhausted but determined ANZAC troops held the high ground overlooking the runway. Control of Maleme would decide the battle for Crete.

This scenario represents the chaotic opening phase of the battle, with German airborne forces attempting to seize the airfield before ANZAC defenders can reinforce and stabilise their lines.

SET-UP

The table should include the following: Maleme Airfield runs across the centre of the table (12–16” wide), consisting mostly of open ground. One Control Tower / Administration Building on the airfield. One Hangar or Supply Building on the airfield. Low hills or ridgelines near the airfield 
Scattered olive groves, stone walls and sandbags.

ANZAC (Defender):

May deploy half of their units anywhere outside the airfield, up to 12” from the centre lineThe rest are held in reserve.

German Fallschirmjäger (Attacker):

No units deploy at the start of the game. All German units arrive using the Scattered Drop special ruleUp to half of the units arrive in the first turn. The rest are kept in reserve. ANZAC troops enter the battlefield from a random table edge.

OBJECTIVE
Primary Objective – Control the Airfield

At the end of the game, a side controls the airfield if it has more infantry units wholly within the airfield zone than the enemy. Worth 2 Victory Points

Secondary Objectives

At the end of the game a side controls the Control Tower or Supply Building if, one side has at least one infantry unit in or within 2" of it and the enemy has none.

FIRST TURN

The German Fallschirmjäger take the first turn.

All German units arrive on Turn 1 using the Scattered Drop special rule (See below).

GAME DURATION

The game lasts 6 turns. At the end of Turn 6, roll a D6: On a 4+, play a Turn 7 otherwise, the game ends


SPECIAL RULES

GERMAN:

Scattered Drop
When a German unit arrives it enters in the centre of a random table quarter, roll a D6:

1–2: Scatter D6+6” in a random direction

3–6: Scatter D6” as normal

If the unit scatters into impassable terrain or enemy units, it suffers D3 pin markers and is placed as close as possible.

Mission Focused
Fallschirmjäger infantry units ignore the first pin marker they receive while within the airfield zone.


ANZACS:


Stubborn Defence
ANZAC infantry units may re-roll failed Morale tests while within 12” of an objective. 

Command Confusion
From Turn 4 onwards, at the start of each ANZAC turn, roll a D6. On a roll of 1, one randomly selected ANZAC unit automatically receives a Down order this turn.

VICTORY:

At the end of the game calculate victory points as follows:

A player scores 2 victory points for controlling the airfield. A player also scores 1 victory point for controlling the Supply Building or Control Tower.

The side with the most victory points wins the battle


Sunday, October 5, 2025

Battle report: Trench Warfare

The motorbike surges forward
March 1945 -  The early morning mist clung to the broken ground between the two trench systems in Western Germany. A battered expanse of craters, wire, and shattered timber separated the Germans and British — both intent on seizing the other’s line in a grim echo of the Great War. 

The battle began with artillery raining down on both sides, causing casualties and pinning many of the units hunkered down in their trenches. The quiet after the barrage was interupted with the roar of engines as an SS motorbike burst from the German line, racing across no man’s land like a streak of lightning. The bike skidded to a halt almost point-blank before a British rifle squad and unleashed its MG fire. The sharp burst of rounds cut down men instantly, sending others diving for cover in panic.

The flamethrower is ineffective against the tank
But the British recovered fast. Brens, rifles, and even the distant cling of the PIAT fired in retaliation. At last, a direct hit from the PIAT sent the motorbike tumbling into a plume of black smoke and flame. The men cheered — but the cost was high. Nearly every gun on the British line had fired at the speeding menace, leaving their right flank dangerously exposed.


Seeing an opening, a German flamethrower team surged forward, darting between shell holes toward the British Stuart light tank that guarded the center. The operator raised his weapon, loosed a gout of flame that sputtered weakly against the Stuart’s armor. Before he could try again, the fuel tank coughed dry. The team froze in horror. The Stuart’s turret swung toward them, its machine gun chattering. When the smoke cleared, nothing of the flamethrower team remained but scorched earth.

SS troops are struck by the mortar shells raining on them 
The failed flamethrower assault didn’t slow the SS fanatics. With chilling discipline, they surged forward, supported by a Panzer II rattling up behind them. The light tank’s autocannon hammered round after round into the British assault wave trying to cross no man’s land. Shells burst among them, shredding the momentum of the attack.

Pinned and bloodied, the British push faltered. The SS stormed the trenches, grenades flying and bayonets fixed. Close-quarters shooting was brutal, fast, and decisive. Within minutes, the Union Jack that had marked the British line was trampled into the mud. The surviving Tommies, leaderless and reeling, began to fall back toward their reserves.

The Germans storm the trench and capture the line
By late afternoon, the smoke had settled. The once-empty no man’s land was now strewn with the dead and dying. The SS held both trench lines, their peadot uniforms stained with mud and blood. A lone British officer called for a withdrawal — their attempt to seize the enemy trenches had failed.

For the Germans, it was a hard-fought victory, earned through aggression, coordination, and sheer brutality. For the British, it was a bitter defeat — a reminder that even in 1945, some parts of the war could still look hauntingly like 1915.


Another GREAT game of bolt action 3rd edition. The game was extremely swingy with the British looking like they had lost by turn 2 but then reclaiming momentum to only be defeated by the Germans capturing a trench line leaving a final score of 4-2 German way. As usual the dice decided to make the story with many morale checks failed, missed shots and hot rolling swinging the combat. One thing we decided on was that for the future we will re-introduce the 'small teams' rule to give teams (that begin the battle) of 2 or less a -1 to be hit. As it is, it seems way too easy to shoot down these smaller teams than it used to be in 2nd edition. We'll see how it goes but I can't imagine it will be too broken!

 Looking forward to my next game and trying out some new toys for both sides.

Signing out,

Chewie. 


Monday, September 29, 2025

Scenario: Trench Warfare

Inspired by my recent trench terrain I wanted to have a go at making a scenario aimed at two dug-in sides trying to capture each others trenches and being forced to attack across no-mans land. While I can't think of any direct battles from WW2 I imagine this could easily represent some WW1 action. 


German soldiers take up position in a trench

SCENARIO:

Two opposing forces face each other across a scarred battlefield of dugouts, craters, and barbed wire. Each side has established a trench line, and now both are ordered to break the deadlock by seizing the enemy’s fortifications. The battle will be decided by who can both hold their own trenches and wrest control of the enemy’s.

SET-UP:

The table should feature multiple parallel trench lines running across the width of the battlefield, each roughly one-third of the way in from the respective players’ table edges. Between them lies no-man’s-land, filled with shell holes, barricades, and scattered terrain for cover.

Both sides deploy up to half of their units (rounding down) within or directly behind their own trench line. Any units not deployed at the start are left in reserve.

Reserves cannot outflank in this scenario.

OBJECTIVE:

Both players must capture and hold sections of the enemy trench line while defending their own. A section of trench is considered captured if, at the end of the game, one side has at least one infantry unit in or within 2" of it and the enemy has none. Vehicles do not count towards capturing trenches.

PREPARATORY BOMBARDMENT:

Both sides receive a preparatory bombardment to represent simultaneous attacks along the line. Roll separately for each bombardment before the first turn.

FIRST TURN:

The battle begins. During Turn 1, each player may move their reserves onto the table from their table edge, following the usual rules.

GAME DURATION:

Keep a count of how many turns have elapsed as the game is played. At the end of Turn 6, roll a die. On a result of 1, 2, or 3 the game ends. On a result of 4, 5, or 6 play one further final turn.

VICTORY:

At the end of the game calculate victory points as follows:

A player scores 2 victory points for each section of enemy trench captured.
Both players also score 1 victory point for every 2 enemy units destroyed.

The side with the most victory points wins the battle

Monday, December 9, 2024

Scenario 5: 107th Panzer Assault on the Son Bridge

Background: September 20st 1944, after the initial destruction of the Son bridge over the Wilhelmina Canal and the Allied success in constructing a Bailey bridge to allow XXX Corps to continue their advance, the Germans mount another concentrated effort to disrupt the Allied supply lines and delay their progress toward Nijmegen and Arnhem. German infantry and tanks advanced toward the bridge under the cover of smoke and suppressing fire while the 101st Airborne Division, who had been tasked with defending the bridge and its approaches, quickly sprang into action to repel the assault. Will the Americans be able to hold on until reinforcements arrive or will the Germans capture the bridge and halt the entire operation?

Baily bridges allowed the allies to rapidly pass rivers and canals.

Scenario: 

Forces:

107th Panzer Division:

2nd Lieutenant + man (Regular)

Heer Grenadier Squad (Regular)
NCO with SMG + 5 rifles (1 Panzer Faust)

Heer Grenadier Squad (Regular)
NCO with SMG + 5 rifles (1 Panzer Faust)

Sturmpioniere Squad (Regular)
NCO with SMG + Flamethrower & loader + 3 rifles.

Heer Grenadier Squad (Regular)
NCO with SMG + 2 assault rifles (1 Panzer Faust)

Panzerschreck Team (Regular)

Motorcyle with Machine-gun side car (Regular)

Panzer IV Ausf H

StuG III 

Sdkfz 251/1 Half-track

101st Airborne Division:

2nd Lieutenant + man (Veterans)

US Paratrooper Squad (Veterans)
NCO with SMG + 3 rifles + LMG and loader.

US Paratrooper Squad (Veterans)
NCO with SMG + 3 rifles + LMG and loader.

US Paratrooper Squad (Veterans)
NCO with SMG + 3 SMGS + 2 rifles.

US Air Observer (Veteran)

British Infantry Section (Regular)
NCO with SMG + 7 rifles 

British Infantry Section (Regular)
NCO with SMG + 7 rifles

Bazooka Team (Veterans)

Heavy Machine Gun Team (Veterans)

M3 37mm Anti-Tank gun Team (Veterans)

M3A3 Stuart Tank (Regular)

M4A1 Sherman Tank (Regular)

Mission Objectives: 

The German forces must seize the Baily bridge over the Wilhelmina canal. The German player gets 1 VP for every US Unit destroyed and 5 VP if they control the bridge at the end of the game. The US player gets 2 VP for every German unit destroyed.

Special Rules: 

Wait for XXX Corps!: The Guards Armoured Division and supporting units from XXX Corps moved to reinforce the 101st Airborne during the battle but it took them a while to get there! The British Infantry and tanks must be held in reserve and can only begin to enter the field from turn 3. 

Looking forward to playing out this armor heavy scenario in a cracking game of bolt action!


Signing out,

Chewie.

Wednesday, March 8, 2023

Scenario: Assault on the Flak Battery

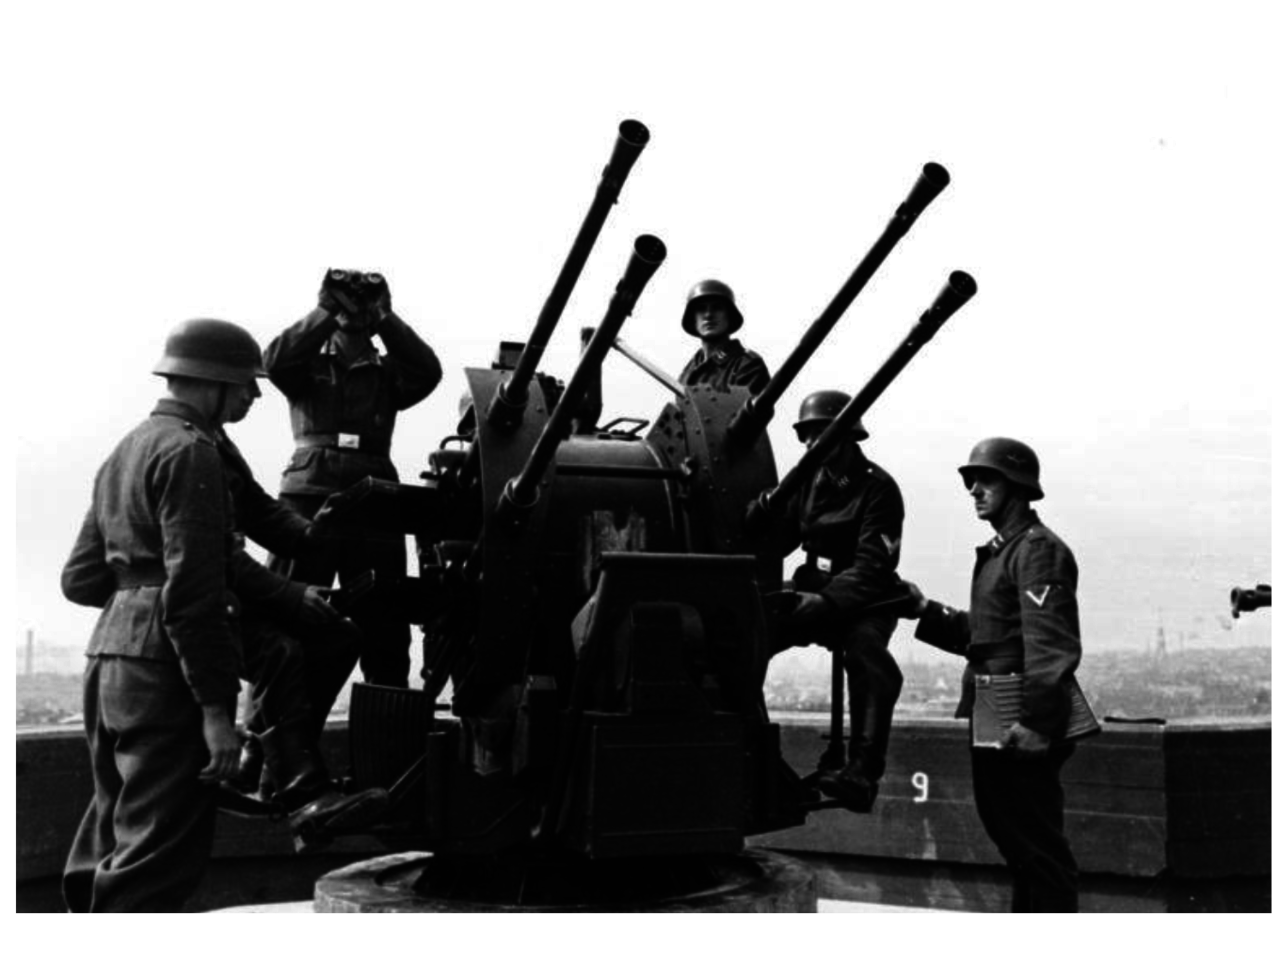
Missing our Normandy campaign and in anticipation for a future Market Garden campaign I have decided to have another crack at making a fun scenario to scratch the itch and give me a great excuse to field my new Flakvierling 38!

The scenario is named "Assault on the Flak Battery" and is an attacker and defender scenario played on a 4'x4' board. 


German Flugzeugabwehrkanone (Flak) 38


SCENARIO: ASSAULT ON THE FLAK BATTERY

Background: September 17th 1944:  British 1st Airborne Division have been dropped into multiple towns across the Netherlands as part of the allies bold plan Operation Market Garden. Blown off course by fierce flak fire a group of paratroopers find themselves far from their LZ and objectives. Rallied together by a daring 1st Lieutenant the hastily organised forces spot a German Flak gun firing wildly into the sky. The Brits spring to action with a plan to silence the gun and give their boys in the sky a chance at coming in safe!

FORCES:

British 1st Airborne:

First Lieutenant and man with SMGs. (Veteran)

Paratroop Section (Veteran)
4 Infantry with rifles
1 Infantry with SMG
1 NCO with SMG

Paratroop Section (Veteran)
4 Infantry with rifles
1 Infantry with SMG
1 NCO with SMG

Paratroop Section (Veteran)
4 Infantry with rifles
1 Infantry with LMG (Requires loader)
1 NCO with SMG

PIAT Team (Veteran)

Jeep (Veteran)
Pintle-mounted MMG.


176th Luftwaffe Flak Division:

Second Lieutenant and man with SMGs. (Regular)

Luftwaffe Defence Squad (Regular)*
4 Infantry with rifles
1 NCO with SMG
1 man has Panzerfause in addition to other weapons.

Luftwaffe Defence Squad (Regular)*
4 Infantry with rifles
1 NCO with SMG
1 man has Panzerfause in addition to other weapons.

Heer Grenadier Squad (Regular)
3 Infantry with rifles
1 Infantry with Assault rifle
1 NCO with SMG

Heer Grenadier Squad (Regular)
3 Infantry with rifles
1 Infantry with Assault rifle
1 NCO with SMG

Medium Machine Gun Team (Regular)

20mm Flakvierling 38 (Regular)
Gun Shield

*These squads have the Shirkers special rule.

SET-UP

The Flak gun should be placed in an entrenched position in the centre 6" from the defenders edge. The terrain leading to the flak gun should be a mixture of soft and hard cover with many of line of sight blocking elements.

The defender sets up at most half of his units (rounding down and including the gun) 12" from his table edge. Units that are not set up to start with are left in reserve. The attacker's units are not set up on the table at the start of the game. The attacker must nominate at least half of his force to form his first wave. This can be the entire army if he wishes. Any unit not included in the first wave is left in reserve.

Reserves are allowed to outflank in this scenario.

SPECIAL RULES:

Keep that Flak firing!
The Flak gun is too busy firing into the sky and is unable to fire at ground targets in the first turn. In addition, the order dice for the Flak gun should be  a separate colour from the defender and attacker order dice. The Flak gun can only activate when this specific order dice is drawn.

Well Crewed
The Flak gun has 1 extra crew member from what is noted in Armies of Germany book.

OBJECTIVE:

The attacker must try and silence the Flak gun. To silence the gun all of the gun crew must be killed or routed.

PREPARATORY BOMBARDMENT:

As this strike is carried deep behind enemy lines there is no preparatory barrage used in this scenario. 

FIRST TURN:

The battle begins. During turn 1, the attacker must move his entire first wave onto the table. These units can enter the table from any point on the attackers table edge, and must be given either a run or advance order. Note that no order test is required to move units on the table as part of the first wave. 

GAME DURTAION:

Keep a count of how many turns have elapsed as the game is played. At the end of turn 6, roll a die. On a result of 1,2 or 3 the game ends, on a roll of 4,5 or 6 play one further final turn. 

VICTORY:

As soon as all the crew are destroyed or routed then the game ends and the attacker wins.
At the end of the final turn, if the Flak gun still has at least 1 crew member, then the defenders win. 

I'm very keen to play this out and I think it could be a bit of fun. The theme could easily be extended to any other airborne invasion in WWII (Normandy, Crete, Sicily) with only some minor tweaking and expanded to say 1000 points (perhaps even two guns or a whole battery!). I'm looking forward to a great game and I hope the scenario can inspire others to design their own or improve and expand on this one!

Signing off,

Chewie


Monday, January 16, 2023

Scenario: Destroy the Supplies

I've tried my hand at making a new scenario for bolt action. The scenario is named 'Destroy the supplies" and is an attacker and defender scenario played on a 4'x4' board. 

British Commando's conduct a raid deep behind enemy lines on the island of Vågsøy, Norway 1941.

SCENARIO: DESTROY THE SUPPLIES

A strike force has been sent behind enemy lines to destroy key objectives, disrupting supply chains and wreaking havoc in the rear echelons. The defenders must quickly react and protect the key objectives.

SET-UP

5 objectives are placed on the board in a 'Z' shape position (See map). These objectives should be tactically important supplies such as an ammo dump, fuel reserve or command post.

The defender picks a side of the table and sets up at most half of his units (rounding down) in the set up area (See map). Units that are not set up to start with are left in reserve. The attacker's units are not set up on the table at the start of the game. The attacker must nominate at least half of his force to form his first wave. This can be the entire army if he wishes. Any unit not included in the first wave is left in reserve.

Reserves are not allowed to outflank in this scenario.

OBJECTIVE:

The attacker must try and destroy all of the objectives on the map. To destroy an objective an infantry or vehicle unit must be given a successful fire order while within 2" of the objective. This order cannot be used to fire at any unit and instead results in the destruction of the objective. Single shot weapons such as panzerfausts are not expended for this fire order.

PREPARATORY BOMBARDMENT:

As this strike is carried deep behind enemy lines there is no preparatory barrage used in this scenario. 

FIRST TURN:

The battle begins. During turn 1, the attacker must move his entire first wave onto the table. These units can enter the table from any point on the attackers table edge, and must be given either a run or advance order. Note that no order test is required to move units on the table as part of the first wave. 

GAME DURTAION:

Keep a count of how many turns have elapsed as the game is played. At the end of turn 6, roll a die. On a result of 1,2 or 3 the game ends, on a roll of 4,5 or 6 play one further final turn. 

VICTORY:

At the end of the game calculate which side has won by adding up victory points as follows. The attacker scores 2 victory points for each objective destroyed. He also scores 1 victory point for every 2 enemy units destroyed. The defender scores 2 victory points for every objective which has not been destroyed. He also scores 1 victory point for every 2 enemy units destroyed.

Map: Scenario - Destroy the supplies.

I imagine this scenario is better suited for smaller battles of <1000pts but perhaps it could be expanded to larger forces. I think a few thematic scenes would really suit this scenario such as an SAS raid in the deep desert, a glider assault dropping men to destroy artillery guns, a strike force sent to capture officers/POWS or a strike to capture fuel reserves vital for an offensive campaign! It would suit many theatres and points throughout the war. I also have no idea if this is balanced or not and will be planning to play this scenario this week so will probably make a follow up post on how it goes. I imagine some extra cheesey lists could be cooked up to rush and capture all the objectives in the second turn but I'm very much a 'beer and pretzels' player so that's not the spirit of the game I'm going for with this - I want something cinematic and fun!

I hope this can inspire other players and lead to some fun games of bolt action.

Signing off,

Chewie.

Battle Report: Forward Operating Posts in Western France

The evening of 9 June 1944 settled uneasily over the Norman countryside, with the fading light casting long shadows across the hedgerows and...