Showing posts with label WWII. Show all posts

Sunday, May 10, 2026

Battle Report: Forward Operating Posts in Western France

The evening of 9 June 1944 settled uneasily over the Norman countryside, with the fading light casting long shadows across the hedgerows and ruined farms of western France, while in the distance the low rumble of artillery reminded everyone that the Allied invasion was still in its opening and most chaotic phase. Into this tense landscape advanced two forces with exactly the same orders and absolutely no knowledge of the other’s intentions. The men of the British 6th Airborne had been instructed to move into a nearby farming village and establish a forward operating base from which future operations could be coordinated inland. At almost the same moment, officers of the German 2nd Panzer Division had selected precisely the same cluster of farmhouses and crossroads for their own temporary headquarters as they attempted to stabilise the rapidly collapsing front. Neither side expected to encounter the other so quickly, and the result was an escalating clash fought among shattered barns, stone fences, and narrow lanes.

The battle opened cautiously, with both sides probing forward through the fields with the kind of careful discipline born from experienced troops who understood just how lethal a careless movement could be. The Germans gradually occupied the right flank of the battlefield, advancing through orchards and along the edges of the main road while their infantry kept close to hedgerows and trenches, while on the opposite side the British airborne troops pushed steadily up the left, using drainage ditches, low stone walls, and ruined farm structures for cover as they attempted to outflank the German advance before the village itself became fully contested.

Germans in the trenches

Early in the engagement, a German 20mm Flak gun was dragged into position overlooking the centre of the battlefield, its crew quickly traversing the weapon toward a farmhouse where reports indicated a British sniper team had taken position in the upper floor. The autocannon opened fire with a violent burst, shells hammering into the stone walls and blasting apart shutters and roof tiles in a storm of splinters and dust. Yet despite the terrifying display of firepower, the barrage proved surprisingly ineffective, with most of the rounds punching harmlessly through the building or detonating against already ruined masonry while the sniper himself remained concealed somewhere within the wrecked upper rooms.

On the German right flank, the battle began to intensify as a squad of Sturmpioneers advanced aggressively toward the British lines, weaving through shell holes and low hedges before finally taking shelter inside a bombed-out farmhouse dangerously close to the airborne positions. The Germans had advanced far enough that the sounds of shouted commands and rattling equipment could now clearly be heard by the British troops nearby, and for a brief moment it appeared that the pioneers might successfully establish a foothold that could unravel the entire British flank. One of the German troopers cautiously raised himself to peer through the shattered upper window and survey the ground ahead, but almost instantly the crack of a rifle echoed across the fields and he fell dead instantly as the concealed British sniper finally revealed his position.

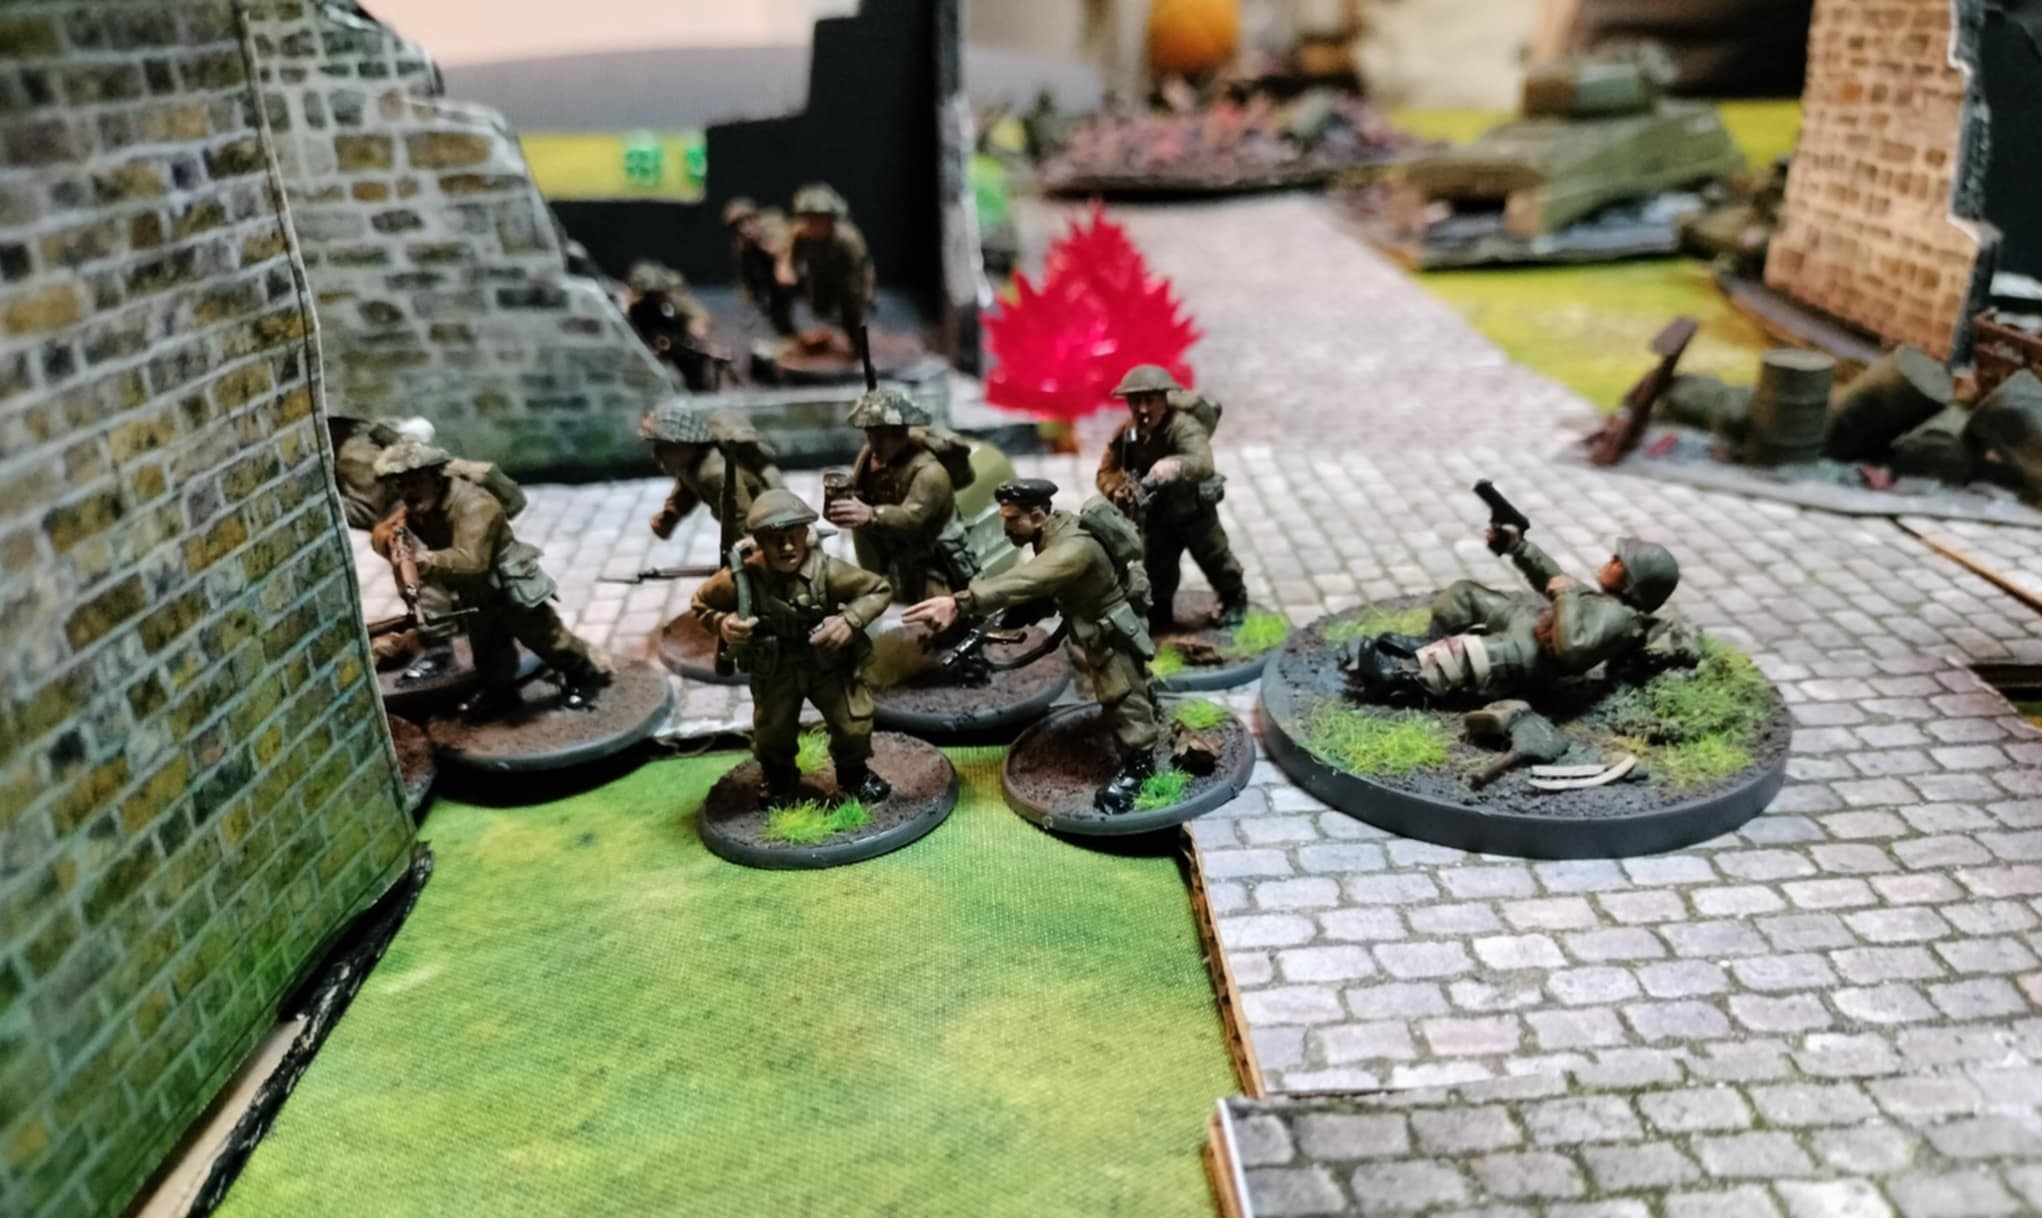
British advance into the road while taking cover

The effect on the Sturmpioneers was immediate and devastating. Certain that the sniper had them perfectly ranged, the Germans threw themselves to the floor and refused to expose themselves again, every broken window and gap in the walls suddenly seeming like a death sentence. Their hesitation proved fatal. Recognising the moment, British riflemen and Bren gunners surged forward with remarkable aggression, pouring concentrated fire into the farmhouse from multiple angles while grenades crashed through the shattered windows. Trapped, pinned, and too terrified of the sniper to properly return fire, the Sturmpioneers were systematically wiped out where they cowered in the rubble below. Within minutes the German advance on the right flank had collapsed completely, leaving the farmhouse filled only with smoke, dust, and dead pioneers.

Yet while success on the flank briefly raised British morale, disaster was simultaneously unfolding elsewhere along the line. Near the centre of the battlefield, the British airborne second lieutenant cautiously advanced toward the main road, attempting to coordinate the movement of several scattered squads whose progress had slowed amidst the confusion of the firefight. Keeping low behind a stone wall and moving carefully between gaps in the cover, he appeared reasonably protected from enemy fire. However, ahead of him near the edge of a forest, a German rifle squad had already established overlapping fields of fire with their MG34 and Kar98 rifles trained directly onto the road. A sudden burst of Spandau fire erupted across the battlefield, accompanied by disciplined rifle shots snapping overhead, and in the chaos a single stray bullet struck the British officer instantly, killing him before he could even collapse fully behind the wall.

The British leader shot 
down by the forest. 


The effect on the British command structure was catastrophic. With their lieutenant dead and communications already strained, confusion rapidly spread among the airborne troops. His adjutant, shaken by the sudden loss and incoming fire, abandoned the field entirely, while the sniper team that had earlier crippled the Sturmpioneers finally broke under the relentless suppressive fire of the German 20mm Flak gun, retreating from the ruined farmhouse as shells continued to tear chunks from the building around them. Nearby, another British squad occupying a cluster of farms waited desperately for instructions over the radio, but after hearing only silence and static they lost confidence in the situation entirely. Unsure whether to advance, retreat, or hold position, the men elected to stay down rather than risk moving into what they feared might already be a collapsing flank. In doing so, they surrendered the initiative at the most critical stage of the battle.

For a time the engagement settled into a tense stalemate, with both sides pinned behind cover and unwilling to risk a costly assault through the open ground separating the village from the surrounding fields. Rifle fire cracked intermittently through the evening air while wounded men called for medics from shattered buildings and roadside ditches. It was during this uncertain lull that the German lieutenant finally made the decision that would determine the battle.

Under a hail of bullets and against the advice of several of his men, the officer suddenly broke from cover and sprinted forward across the road toward a narrow fence line positioned barely sixty feet from the British-held sector of the village. Somehow surviving the storm of incoming fire, he threw himself behind the fence and immediately began shouting for his men to advance, declaring with complete confidence, “Here is where we set up our forward post!”

The position itself was dangerously exposed and far closer to their own line than most of the German high command would have preferred, yet the sheer audacity of the act had an electrifying effect on the exhausted troops around him. German infantry who moments earlier had been hesitant and pinned now surged forward to support the new position, bringing machine guns and rifle teams up behind the fence while others advanced into the nearby farm buildings. Across the battlefield, the leaderless British airborne troops watched the renewed German momentum with growing uncertainty. Without officers to coordinate a counterattack and with units increasingly isolated from one another, their resistance gradually began to crumble.

The spot the forward base was set up

As darkness approached, the British finally abandoned the village, withdrawing back through the hedgerows and leaving the crossroads and farmhouses in German hands. The men of the 2nd Panzer Division immediately began fortifying their newly won position, turning the shattered Norman village into a forward operating base exactly as they had been ordered to do only hours before.

For the Germans it was a hard-fought local victory, but for the British airborne troops the battle was merely a temporary setback. The village had been lost, but the fighting in Normandy had only just begun.

An awesome game of Bolt Action with the Germans eeking out a win by 1VP with the final dice of the game being a run order to move his 2nd Lieutenant up into the 1VP zone! Risky but decisive enough to get the W. The game had some awesome moments like my opponent rolling 3 6's in a row to kill my 2nd Leutenant (not including my failed cover save!!!). That really swung the game around but it quite literally came down to the last roll of the game to decide if it was going to be a draw or German victory. A real nail bitter!

So good to get the boys back on the table after the last few Stargrave games and looking forward to my next game with some new Temu scatter terrain!

Singing off,

Chewie

Sunday, February 8, 2026

Battle Report: The Battle for Maleme Airfield

Battle Report: Maleme Airfield, Crete – 20 May 1941

Dawn broke over Maleme beneath a hard, colourless sky, the air already heavy with the distant drone of aircraft engines as silk canopies blossomed above the olive groves and dry riverbeds surrounding the airfield, and within moments the quiet of the Cretan morning was shattered by rifle fire, shouted orders, and the sharp cracks of bullets snapping through the dust as the German airborne assault began.

The Paras begin to land 

The paratroopers landed in confusion, scattered by wind and enemy fire, and one unfortunate Fallschirmjäger squad drifted far from its comrades and descended directly into the sights of ANZAC defenders positioned on the nearby hills. As the men struggled free from their harnesses and gathered their weapons, accurate rifle and Bren gun fire tore into them, cutting them down almost as soon as their boots touched the ground. There was no chance to regroup or return effective fire, and within minutes the squad had been shot to pieces, their parachutes hanging motionless in the olive trees as grim markers of the price paid for landing in the wrong place.

Elsewhere on the battlefield, fortune favoured the attackers. The remaining German squads landed close together on the edge of the airfield, and despite taking casualties and suffering pins from determined ANZAC fire, their officers quickly imposed order on the chaos. Men were rallied, firing positions established, and disciplined volleys of rifle fire began to hammer the ANZAC trenches overlooking the runway. What had begun as a desperate scramble for survival rapidly turned into a coordinated German foothold, as overlapping fields of fire forced the defenders to keep their heads down and prevented them from exploiting the vulnerability of the landing troops.

From the hills, ANZAC artillery crews attempted to break this growing concentration, but despite repeated adjustments and urgent corrections shouted down the line, shell after shell fell wide of its mark, bursting harmlessly in open ground or overshooting the German positions entirely.  Recognising the opportunity, German troops began pushing forward in small, aggressive groups, advancing from crater to ditch and from stone wall to supply building, steadily expanding their control of the airfield perimeter.

The ANZAC guns on the hill were ineffective

Near the runway itself, the German assault gathered momentum as paratroopers stormed the supply buildings and hangars that dotted the airfield. It was at this moment, as the Germans consolidated their gains, that fresh gunfire erupted behind their lines when a small group of Cretan partisans emerged from cover and opened fire with whatever weapons they could muster. Their shooting was wild and undisciplined, driven more by defiance than training, and though they managed to force the Germans momentarily to ground, the Fallschirmjäger responded. Taking cover in a nearby crater offered the partisans only brief protection, and within moments methodical German fire swept the position, killing them to the last man and extinguishing this brief flare of resistance.

As the battle reached its most dangerous point, a ANZAC Universal Carrier surged forward in an attempt to disrupt the German advance, rattling past a concealed flamethrower team while its own fire proved largely ineffective. The flamethrower ignited, unleashing a roaring torrent of fire that engulfed the vehicle. The operator, frozen in terror and adrenaline, screamed as he held the trigger down, emptying the entire fuel canister in one continuous, horrific burst.

Flames engulf the carrier

With the airfield shrouded in smoke and dust, the decisive moment arrived as German paratroopers launched a determined assault on a ANZAC trench line guarding one side of the runway. Grenades exploded along the parapet, rifles cracked at point-blank range, and after a brief but savage struggle the trench was overwhelmed, forcing the surviving defenders to fall back. With this position taken, the Germans now held complete control of one side of Maleme airfield, and the balance of the battle shifted decisively in their favour.

The defenders are overwhelmed
At the same time, confusion began to spread through the Commonwealth command structure, as the local lieutenant received repeated and contradictory orders urging him to abandon the airfield and prepare instead for a seaborne landing expected elsewhere along the coast. Unaware that Maleme itself was the primary German objective, and faced with mounting pressure on his own front, he hesitated, his ability to command eroded by uncertainty and conflicting demands. Units delayed, orders went unheeded, and precious moments were lost as the defence faltered at the critical point of the engagement.

Although the ANZAC troops managed to hold onto the airfield for a short while longer through sheer determination, the momentum could not be stopped, and the Fallschirmjäger surged forward once more, pushing onto the open runway and securing it under fire. Flares signalled success as German control of Maleme was finally established, and the defenders began their withdrawal toward the hills, conceding the field at last.

As the firing died down and the smoke drifted away, transport aircraft appeared overhead, descending toward the captured runway with reinforcements and supplies, and it was clear to all who witnessed it that the battle for Maleme had decided far more than a single airfield. With its fall, the fate of Crete itself was sealed, and the island passed inexorably into German hands.


Another cracking game of bolt action! This was a very fun scenario with chaotic troop placement, limited cover and a clear objective to play for. As luck would have it I (the ANZACs) was convincingly defeated with a final score of 3 to 7. It was fun to play out this historic battle while reading Beevor's Crete and funny how the dice seemed to emulate history in the break down of command and the Germans seizing the day. Looking forward to our next game!

Signing off,

Chewie. 

Friday, January 2, 2026

Terrain: Gun Emplacement

Enjoying my time off over the Christmas break I've had some free hobby time and so decided to make some terrain from scratch. In the end I landed on a small gun emplacement.

To start I cut some plasticard in an irregular shape to serve as the base (yellow). I then added some small mounds of milliput to simulate the uneven dirt surface of the emplacement. Next, I added some foam core card rectangles to serve as the 'wood wall' of the emplacement. Finally I built up the 'dirt' mound with PVA soaked tissues and left everything to dry.


Once everything was dried I coated everything in PVA glue and covered in sand to add texture. I also added some cut up sprue bits as vertical reinforcements for the 'wood wall'. Then everything was spray painted with a grey undercoat.


Finally, I dry brushed everything with brown paint, painted the wooden wall and dry brushed the rocks making sure to leave some of the grey visible to represent rocks beneath the dirt mounds. As a final touch I added some flock to the earthen areas and some extra large grit sand to the soil within the gun emplacement. 


It's a quick and drity job but plays the part and was dirt cheap to make with only a few left over things and hobby materials I already had from basing. I think once out there on the table it will look great.

A nice way to start the New Year for 2026. I'm looking forward to many more hobby experiences over the year. In particular, playing some more games of 3rd edition bolt action as well as starting a Stargrave Campaign (I might need to start posting about that - though I know this is a bolt action blog!).

Signing off,

Chewie 


Sunday, November 9, 2025

Battle Report: TheTreasures of War

 Battle Report: The Treasures of War

Western France, September 1944. British Army engage Wehrmacht forces in the small village of Cordonbleau. The British Objective is to recover priceless art stolen from the Louvre. The German Objective: Destroy the British ammunition depot and delay their advance toward the German border.

As dawn broke over the rolling fields of western France, the countryside erupted with the distant rattle of gunfire. Both sides advanced cautiously in a cat-and-mouse game across hedgerows, stone walls, and sunken lanes. British and German machine gunners set up on overwatch, scanning the distant terrain for movement. The tension was thick, each side probing for a weakness.

The British armored cars, their engines growling, pushed forward but were shockingly ineffective, their autocannon rounds pinging harmlessly off stone barns and plowed fields. In contrast, the German 20mm Flak gun roared to life, its tracer rounds cutting through the haze. Within moments, the British Vickers machine gun nest that had anchored the left flank was shredded under a hail of fire. Smoke rose from the cratered position as the flank began to buckle. 

The PIAT team creep towards the German position

Meanwhile, a British PIAT team crept closer to a farmhouse where German snipers had taken up position in the attic. Each movement was cautious, deliberate with the crack of rifle fire overhead a reminder of the danger lurking in the rafters. They sprung from their hiding spot and fired a shell into the farm house killing the sniper team. 

The Germans seized the initiative. A platoon of infantry, supported by grenadiers and machine gunners, surged forward along the left flank. Their boots pounded the earth as they stormed over a low ridge, firing wildly as they went. British riflemen from the farmhouses raked them with rifle and Bren fire, cutting down several, but still the Germans came on, driven by orders and desperation.

The British, meanwhile, hesitated in the woods on the right flank, unwilling to break cover and face the German machine gun that guarded the center. The hesitation proved costly  the enemy seized ground, and the British line began to fray under pressure.

The Germans surge down the left flank

As the Germans crested the trench line, the British mortar crew adjusted their sights. A thump echoed across the field — then another. The second shell landed squarely in the midst of the advancing Germans. The explosion tore through the assaulting squad, wiping them out to a man. The cheers from the British positions were short-lived, but morale surged the line had held, at least for the moment.

At the right side of the field, Captain Heinrich Battonberg, a British officer of dubious heritage, saw an opportunity. Grabbing his Sten gun, he charged forward, firing from the hip into the enemy line. The German Leutnant Otto Von Uberschnitznel's attendant fell, clutching his chest. The two leaders locked eyes and opened up with their submachine guns. Bullets tore through the air. When the echoes faded, Battonberg lay still in the mud, his Sten fallen beside him. Uberschnitznel, wounded but standing, gave a grim nod to his fallen foe before rallying his men again.

The Germans claim the trench only to be instantly wiped out by mortar fire.
The British mortar roared once more, and another direct hit ripped into the German position, scattering the survivors and leaving smoldering wreckage in its wake. Both sides, bloodied and exhausted, began to pull back.

The stolen art remained in German hands  secured in the back of a halftrack rumbling toward the rear. The British ammunition depot still stood untouched, though its defenders had paid dearly for it. The British had held the line — barely — but as dusk settled, it was clear they had come off worse, their wounded filling the woods and trenches where the day’s battle had begun.


A cracking game of bolt action and the first game of 3rd edition for my opponent (who commanded the British forces). The mission we played was demolition with a meeting engagement though neither side was able to destroy the opponents base. Before the game started we decided to add a second victory point mission (1 point for every 2 enemy units destroyed) in the case of tie breakers and it ended with a German victory by 1 point! A great game and I was reminded how easy it is to get new people into playing the game with the simple rules of the game, especially when compared to more granular games like Kill Team which my opponent and I also play together. 

Looking forward to many more games in the future (and hopefully I remember to take more photos!) and a small update about some terrain I'm making soon!

Signing out,

Chewie


Monday, September 29, 2025

Scenario: Trench Warfare

Inspired by my recent trench terrain I wanted to have a go at making a scenario aimed at two dug-in sides trying to capture each others trenches and being forced to attack across no-mans land. While I can't think of any direct battles from WW2 I imagine this could easily represent some WW1 action. 


German soldiers take up position in a trench

SCENARIO:

Two opposing forces face each other across a scarred battlefield of dugouts, craters, and barbed wire. Each side has established a trench line, and now both are ordered to break the deadlock by seizing the enemy’s fortifications. The battle will be decided by who can both hold their own trenches and wrest control of the enemy’s.

SET-UP:

The table should feature multiple parallel trench lines running across the width of the battlefield, each roughly one-third of the way in from the respective players’ table edges. Between them lies no-man’s-land, filled with shell holes, barricades, and scattered terrain for cover.

Both sides deploy up to half of their units (rounding down) within or directly behind their own trench line. Any units not deployed at the start are left in reserve.

Reserves cannot outflank in this scenario.

OBJECTIVE:

Both players must capture and hold sections of the enemy trench line while defending their own. A section of trench is considered captured if, at the end of the game, one side has at least one infantry unit in or within 2" of it and the enemy has none. Vehicles do not count towards capturing trenches.

PREPARATORY BOMBARDMENT:

Both sides receive a preparatory bombardment to represent simultaneous attacks along the line. Roll separately for each bombardment before the first turn.

FIRST TURN:

The battle begins. During Turn 1, each player may move their reserves onto the table from their table edge, following the usual rules.

GAME DURATION:

Keep a count of how many turns have elapsed as the game is played. At the end of Turn 6, roll a die. On a result of 1, 2, or 3 the game ends. On a result of 4, 5, or 6 play one further final turn.

VICTORY:

At the end of the game calculate victory points as follows:

A player scores 2 victory points for each section of enemy trench captured.
Both players also score 1 victory point for every 2 enemy units destroyed.

The side with the most victory points wins the battle

Friday, June 27, 2025

Battle Report: Saving Private Damon

Autumn 1944 in a shattered Dutch town. British Army forces are tasked with extracting a wounded paratrooper who holds crucial intelligence on upcoming German counter-offensives. The SS have moved into the village ruins to capture or kill him. Time is running out.

The Vickers set up in the crater.

The battle opened under a leaden sky. British infantry crept into position while a Vickers machine gun team set up in a smoldering shell crater overlooking the town's central avenue — the paratrooper was believed to be wounded and positioned down the road. As the Vickers team adjusted their sights, a Kubelwagen sped into the battle and fired from the far side of town. The first burst tore through the crater’s edge, mowing down the team. Only one shaken private survived, his loader crumpled beside him.

Down the main street, a British 6-pounder anti-tank gun was wheeled into position by a sweating crew. Its barrel locked down the rubble-strewn road — guarding the paratrooper’s last known position. Then came the low rumble of tires and armored plates. A Humber Armored Car rolled forward, firing a shot at the Kubelwagen that had pinned the Vickers team. The round smashed into a wall just wide of the mark, kicking up dust but leaving the vehicle intact.

As the firefight escalated, SS and British troops exchanged fire with varying levels of success. The buildings provided cover British officers radioed for an artillery strike, coordinates already pre-sighted onto the German-occupied buildings. But word came back: the artillery battery was engaged with fighting elsewhere on the front — no support was coming for this battle. The mission now depended on raw courage.
The British make contact with the Para!


Panzer IV crashing through the rubble
As the crack of rifles and the bark of machine guns echoed through the ruined village, Lieutenant Langerton watched his section hesitate in the open, pinned down by crossfire. The wounded paratrooper lay only yards away, slumped against a wall amid shattered bricks and tangled wire. Realizing the urgency, 
Langerton leapt from cover and sprinted into the street, but as a 20mm Flak shell screamed overhead and exploded nearby, the force of it knocked Langerton  down. Dust filled his lungs, and terror gripped his chest like ice. His voice caught. His courage faltered. He threw himself to the ground, trembling, his orders lost to the din. His men, watching their officer paralyzed with fear, wavered—until Sergeant Whitlow barked a curse, rallied the section with a growl of resolve, and charged into the firestorm himself, picking up where Langerton could not.

With the Germans repositioning, the British infantry squad sprinted down the avenue, bullets buzzing past like angry wasps. A 20mm Flak gun barked from a nearby woods. LMGs and rifles opened up from shattered windows. Bodies dropped left and right — only Sergeant Whitlow, bloodied and limping, reached the collapsed building where the paratrooper lay moaning in the dust.Without hesitation, the sergeant threw the wounded man over his shoulder and sprinted back through hellfire. Germans fired wildly, panic setting in as they realized their prize was slipping away.

The lone Sergeant Whitlow makes it back to the Bren Carrier
A Panzer IV lumbered into view, its crew a ragged mix of inexperienced Ostfront conscripts, hastily pressed into service. The turret swiveled toward the fleeing men. Shells clanged as the crew fumbled to load and fire — but every shot missed. With smoke and chaos all around, the Bren Carrier roared to life, its engine choking through dust. The sergeant threw the paratrooper in and vaulted aboard just as the vehicle lurched into motion. Bullets pinged off the hull as it sped away, carrying its precious cargo to safety.

 The British extracted the paratrooper. The intelligence was recovered. The Germans had thrown everything they had into the fight — but their panic, inexperience, and lack of coordination cost them dearly.


Another great game of Bolt Action! This was our second game with the 3rd edition rules and went quite well. I think the rules are pretty good though shooting is a lot deadlier now, with small teams being quite easy to pin down and eliminate even when in buildings or behind cover, something which was much harder in 3rd edition. As is the case with bolt action, there was some amazing moments told by the dice such as the British officer making a snap to order to essentially win the game only to roll 2 6's on the order test and go down instead!! As well the artillery barrage never arriving despite the 2 dice roll thanks to the British special rule!! 

As always, looking forward to the next game.

Signing out,

Chewie. 


Friday, November 22, 2024

Review: RKX Miniatures 3D printed by OzWargaming

I wanted to share my thoughts on something new I recently tried for my Bolt Action armies: 3D printed models. I’ve been hearing a lot about how 3D printing is taking the wargaming community by storm, so I decided to dive in and see what all the fuss was about. For this experiment, I purchased a mix of British and German models from OzWargaming, featuring sculpts from RKX Miniatures’ 28mm WWII range. Here’s my review and honest thoughts on this experiences 

This was my first time working with 3D printed miniatures. As someone who’s used to the crisp sculpts of Warlord Games and Rubicon’s plastic kits, I wasn’t entirely sure what to expect. The models I received were nicely detailed and mostly to scale with Bolt Action miniatures, which was a pleasant surprise. For example, I tried mixing a 3D printed gunner and machine gun with loaders from Warlord Games’ British/Canadian Infantry Plastics, and the result was surprisingly seamless—the figures blended together nicely.

However, the 3D prints weren’t without issues, so let’s break things down.

  • Scale Compatibility: For the most part, the scale of the 3D printed figures works well alongside Bolt Action minis. This was particularly noticeable with infantry pieces, where I could mix and match components with no glaring size discrepancies.


The middle model is a 3D print from RKX minis and the other 2 are Warlord plastics


  • Detail: The sculpts themselves are decent, with a good level of detail on weapons, uniforms, and equipment. The models capture the essentials of WWII-era soldiers nicely.

Unfortunately, the 3D printed models fell a little short when compared to traditional plastic kits. Here are the main issues I ran into:

  1. Textured Finish: One drawback for me was the slightly textured surface of the models. While this texture largely disappears after priming and painting, it’s not as smooth as Warlord or Rubicon plastics, and that initial difference was noticeable.

  2. Brittle Material: The resin/plastic material used in the 3D prints felt brittle compared to traditional plastic kits. This is a major concern for wargaming miniatures, as they’re handled frequently during games. I worry about long-term durability, especially when it comes to thinner parts like gun barrels. E.g. the Bren Carrier was shipped to me with damaged tracks and it's not easy to fix.

  3. Print Quality Issues: While the detail on most models was solid, there were a few noticeable flaws. For instance, the Flak 30 model I received had a wonky wheel that I couldn’t ignore. These imperfections can be frustrating, especially for those of us who love precision in our armies.


    Left: Wonky wheel, Right: Good wheel.


  4. Scaling Problems: One particular issue I noticed was with the crew for the Universal Carrier. The crew models were noticeably smaller in scale compared to the infantry figures. While this isn’t unique to 3D prints (Rubicon and Warlord tank crews also suffer from this problem), it’s still worth mentioning.

    Notice how much bigger the warlord model is compared to the crew


Overall, my first experience with 3D printed miniatures has been... fine. They’re OK, but they didn’t blow me away. For someone with their own 3D printer setup, this would be a fantastic and affordable way to bulk out armies or create rare units that aren’t readily available from traditional manufacturers. However, as a one-off purchase, I personally prefer the quality and reliability of Warlord Games, Rubicon, or Tamiya models over 3D printed minis.

That being said, if you’re on a budget or looking for something specific that isn’t sold elsewhere, 3D printing could be a great option. For me, though, I’ll be sticking to the tried-and-true plastic kits for now.

Signing off,


Chewie

Wednesday, December 20, 2023

Army Showcase: British Airborne

In preparation for next years "Market Garden" campaign I have been working on a British airborne force which is now finally finished (can an army every be finished?). The army is an infantry heavy British Airborne list with Operation Market Garden in mind but could easily be used for D-Day 6th Airborne in a pinch.

British 1st Airborne:

 Let's have a look at the units!

Lieutenant and man:


A simple two man squad with Sten guns and minor arm swap from the SS kit on the leutenant. I wanted to capture an 'Urquhart-esque' character so the mustache was a must.

Infantry Squad 1:


The three infantry squads are run as 8 man veteran squads with Bren LMG and loader. The sergeant is equip with SMG and there are many subtle conversions throughout such as arm swaps, head swaps and captured German weapons.

Infantry Squad 2:


Squad 2 is set up identical to the above.

Infantry Squad 3:


As is Squad 3!

Sniper Team:


One of my goals with this army was to replace all metal figures with plastic conversions and this sniper team is an example of that. The spotter is a simple conversion of plastic airborne bits pointing out his target while the Sniper is the prone body from the US airborne kit with a head-swap, gun-swap and British webbing. I think they really look the part of a deadly sniper team!

PIAT Team:


The PIAT team was put together using British Airborne sprue with no major conversions or changes. They do the job nicely!

Mortar Team:


This mortar team + spotter are completely converted from plastic bits with the Mortar being the only metal piece I kept from the original kit. I feel like they capture the frantic team very well and I have a detailed description of each model here.

Medium Machine gun Team:

Again this MMG team has been made from plastic conversion with the original metal gunner from the warlord starter army. I decided to go with a 'scenic' base showing the MMG positioned in some bombed out ruins with the two loaders bringing up ammo for the gunner. The gunners Lee Enfield rifle can be seen resting on the broken brick wall to the right. This was a fun build and each figure is removable from the base to depict casualties suffered by the team.

Medium Machine gun Team:


The infamous 'Free British Observer'! This was a simple kit bash using airborne parts and a radio made from paper-clips, a plastic ammo box and milliput. I like to imagine he's screaming co-ordinates to repel a German attack on the airborne pocket in Oosterbeek! 

6 pdr Gun:


This 6pdr gun will provide some much needed anti-tank support for the force! Once again all the metal crew replaced with plastic conversions. I also opted for a scenic base and all of the crew are removable. I have a detailed description on how this was made here.

Airborne Jeep:


The only vehicle in the entire list - the trusty Airborne Jeep! This is a rubicon 1/4 ton 4 x 4 utility truck kit and while Rubicon make absolutely stunning vehicles (the best 56mm kits by far in my opinion) I feel like the model is slightly too small for the bolt action scale and the crew definitely leave something to be desired. I tried a head-swap with airborne bolt action heads but the scale difference made it look ridiculous.  In any case when they are all out there on the table they look the part well enough!

That's it for the airborne army and I believe the whole thing comes out to ~1000pts with all the veteran infantry. It's been a treat to put this force together and the small conversions and making of the plastic crews was an excellent hobby experience. I really put a lot of effort into these guys and I hope that comes across. Things to add in the future would be a howitzer and maybe a Tetrarch tank!

Next up will be my SS army who will be fighting these guys in the 'Market Garden Campaign!'

Signing out,

Chewie. 


Battle Report: Forward Operating Posts in Western France

The evening of 9 June 1944 settled uneasily over the Norman countryside, with the fading light casting long shadows across the hedgerows and...