Showing posts with label Terrain. Show all posts

Friday, January 2, 2026

Terrain: Gun Emplacement

Enjoying my time off over the Christmas break I've had some free hobby time and so decided to make some terrain from scratch. In the end I landed on a small gun emplacement.

To start I cut some plasticard in an irregular shape to serve as the base (yellow). I then added some small mounds of milliput to simulate the uneven dirt surface of the emplacement. Next, I added some foam core card rectangles to serve as the 'wood wall' of the emplacement. Finally I built up the 'dirt' mound with PVA soaked tissues and left everything to dry.


Once everything was dried I coated everything in PVA glue and covered in sand to add texture. I also added some cut up sprue bits as vertical reinforcements for the 'wood wall'. Then everything was spray painted with a grey undercoat.


Finally, I dry brushed everything with brown paint, painted the wooden wall and dry brushed the rocks making sure to leave some of the grey visible to represent rocks beneath the dirt mounds. As a final touch I added some flock to the earthen areas and some extra large grit sand to the soil within the gun emplacement. 


It's a quick and drity job but plays the part and was dirt cheap to make with only a few left over things and hobby materials I already had from basing. I think once out there on the table it will look great.

A nice way to start the New Year for 2026. I'm looking forward to many more hobby experiences over the year. In particular, playing some more games of 3rd edition bolt action as well as starting a Stargrave Campaign (I might need to start posting about that - though I know this is a bolt action blog!).

Signing off,

Chewie 


Friday, July 11, 2025

Review: Temu Trench Terrain

I recently saw an add for some terrain on Temu pop up while browsing the internet and had a lapse in judgement and impulse ordered it. The set was for a " Modular Trench Warfare Terrain Set for Tabletop Wargames – 28mm" and was being sold for ~$20 AUD ($13 USD). After a few weeks it finally arrived and I have to say, I was pleasantly surprised with what I got, especially considering the price.


The pieces in question


 The pieces are a 3D printed grey plastic and while not the greatest sculpts or quality (you can still see the print lines quite easily, they are good for what you paid. I ended up giving them a prime with some grey primer and a quick paint with dollar store acrylics + some Vallejo colours.

All painted up
 

In the end i'm really happy with how they came out. The size is slightly small and while they snuggly fit a 25mm base for bolt action they are slightly too big to fit a 32mm base for my kill team model.

The Bolt action 25mm base fits in well (left) but the T'au stealth suit is slightly too big (right).     


 Getting the pieces out on the game mat, they look great.

Trench warfare!

In any case this has given me some confidence in the cheap Temu terrain and I very likely will be ordering some other pieces to see if they hold up or if I just got lucky with this one. Looking forward to featuring these in our next game of bolt action with a Trench Warfare scenario! 

Signing out,

Chewie


Thursday, February 23, 2023

Terrain Piece: Rubble Piles

Whilst looking at some photos from various WWII battles I was struck by the seas of bricks and rubble that the soldiers seemed to find themselves fighting through. Stories from Stalingrad and Caen described how the bombed out cities resulted in clogged streets of rubble often times taller than a man.

World War II: The Eastern Front - The Atlantic
Soviet soldiers take cover in piles of rubble from blasted buildings while engaging German forces in street fighting on the outskirts of Stalingrad 1943  


Inspired by these photos and stories I decided to try my hand at making some rubble piles for my Bolt Action gaming board. I got the glue, paint and cardboard out and decided to document my process for other gamers to give a try using my recipe! I was going for something (1) quick and (2) easy with the build and overall am very happy with how it turned out:


Step 1: 

Using regular cardboard (literally from a case of beer) I cut the rough shape for our pile of rubble. I didn't want a perfectly regular circle or rectangle so I went with a rounded oval.


Step 2:

Next I crinkled a handful of kitchen paper into a ball and places it onto the centre of the cardboard base. I then covered the entire paper-ball-mound with PVA and water (75:25 ratio) and left it to dry.


Step 3:

Once dry and hardened up, the entire base and mound was covered PVA and then in sand. This is the sand I use for basing and is sand I took from a local park.


Step 4:

Next I began by cutting up old sprues into shapes for bricks, scaffolding, wooden beams and other detritus of bombed out buildings. I threw in some random left over bits I had from various kits. Wall pieces from the Warlord farm house, some tires from old rubicon kits and random stowage bits.


I also bought a bag of these MDF cut "Bag of bricks" sold by Battle Kiwi a New Zealand based company. I think I got it for ~$10 AUD and it has enough bricks for plenty of terrain and basing projects.


I glued the bricks and sprue rubble down using PVA glue again.


Step 5: 

The entire piece was sprayed with a grey primer. Just regular cheapo hardware store grey paint.


Step 6:

Finally I painted the bricks shades of grey, brown and orange to break up the colours a bit. Various sprues were painted with either flat brown, flat earth or boltgun metallics. Then entire thing was washed in GW's agrax earthshade for a bit of shading. Finished!

I made a bunch of different shapes and sizes for some variety scatter terrain in our bolt action games. Here's a few shots of them in action:

The US Sherman is halted by rubble on the roads.


US machine gun team sets up behind the cover of debris.

Sturmpioniere advance over the rubble whilst taking fire.


Overall I am very happy with how they turned out and this has been a full little project. I imagine this recipe could easily be used for other tabletop war games like 40K or infinity - just throw some sci-fi bits into the rubble! I hope this guide serves as inspiration to other players out there looking for some cheap and easy scatter terrain.

Signing out,

Chewie


Monday, February 21, 2022

Terrain Piece: Wrecked Sherman

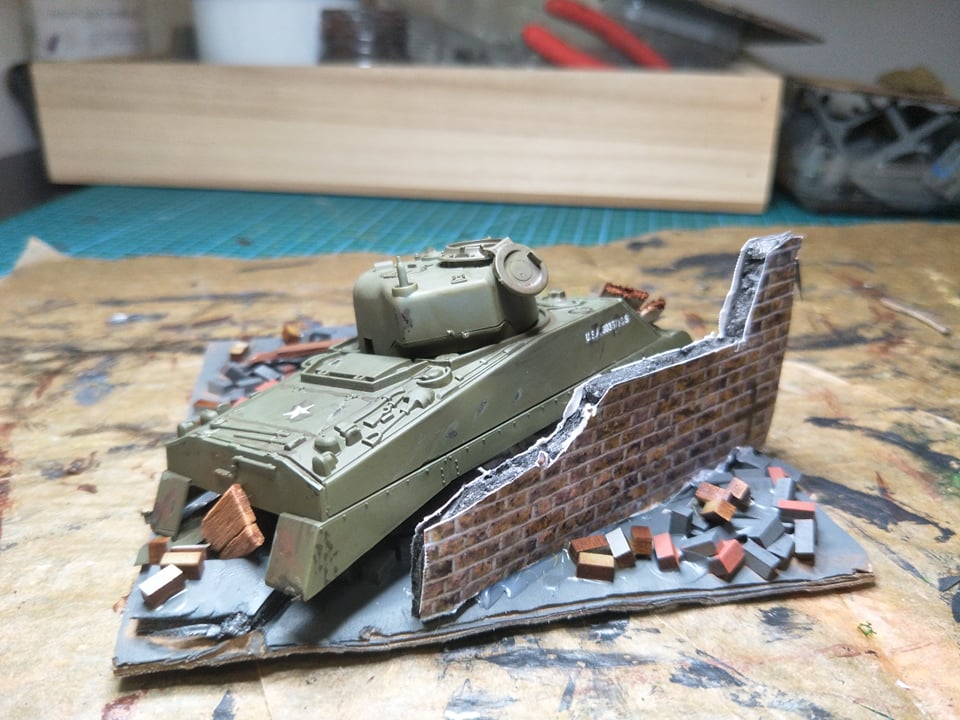
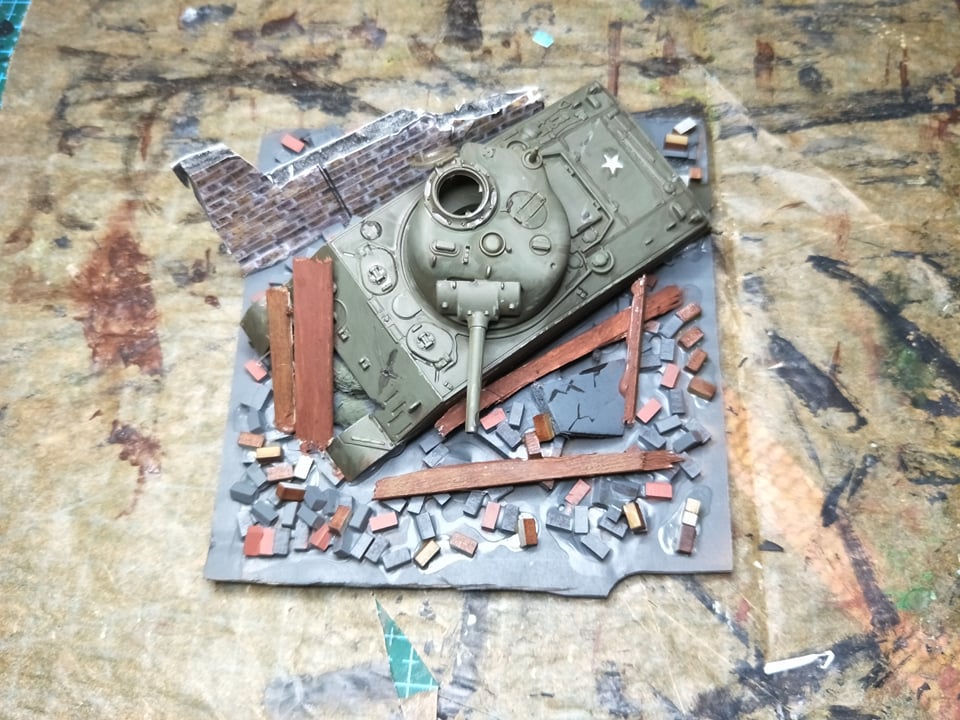
As part of rubicons M4 Sherman/Firefly IC kit (which is an excellent kit!) you are given the choice between small or large hatch hulls to make the different builds of Sherman. I went for the late war M4A1 for my Normandy force and was left with a spare turret and hull from the kit. It seemed like a great opportunity to put together a terrain piece for use in our Bolt Action games.


I stuck the remaining hull and turret together and based it all on some card. The inside of the tank is propped up with crumpled paper. The foam core wall was made with prints stuck on foam. The rubble is MDF bricks, cut up sprues and paddle-pop stick wooden beams. 


All in all I'm very happy with how it looks and think it will really add some character to the battlefield. It was also a pleasant break from painting the usual miniatures for the two armies I'm making. Might have to bust it out in the next game!


Signing off,

Chewie
Battle Report: Forward Operating Posts in Western France

The evening of 9 June 1944 settled uneasily over the Norman countryside, with the fading light casting long shadows across the hedgerows and...