As part of the Normandy campaign we are playing through. I have been building a US airborne army for use in the Overlord - Market Garden period. I started Bolt Action last year with the 'Band of Brothers' starter set which pits US airborne against Wehrmacht grenadiers, so these are the two armies I have decided to make (for now!).
For the US airborne army I wanted to have some Airborne troops backed up by US army troops and armor. To capture that I've got a mix of squads with the plan of eventually making two individual armies which I can mix and match depending on the battle or mission. I bought two additional US army sprues and mixed those with the US airborne box to make this army. All together it comes to around ~1200pts (depending on if you take the troops as veteran or regular).
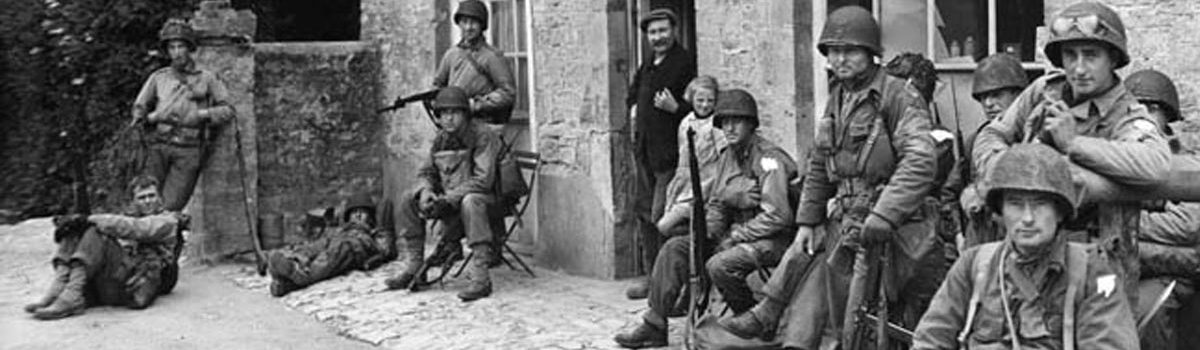
501st Parachute Infantry Regiment:

2nd Lieutenant with man.
I modeled the 2nd lieutenant (right) with man (left) from a combination of US and german parts. The Lieutenant has grenadier binoculars and Gewehr 43. I was inspired by the story of Dick Winters losing his weapon on his drop for Overlord and having to use captured German weapons. The 'man' has a US airborne head with the mohawk trimmed off. I have armed them both with rifles to get the most of the 'fire and maneuver' US special rule.

Infantry Squad with BAR.
The first squad I made from the Band of Brothers set. I went for 9 men including NCO with SMG and 1 BAR as included in the box (even though I've never seen any historical photos of Paratroopers jumping with BARs). The uniform for all of these guys is Vallejo's Russian Army Uniform and flat brown + Khaki for the trimmings. For the entire army I've tried to have the NCOs pointing for easy identification on the tabletop. I also included a medic model for use as a stand alone medic or as a bit of flavour for one of the riflemen.

Infantry Squad with BAR.
The second squad made identical to the one above with some slightly different poses. Once again I have included a BAR and NCO with SMG.

Infantry Squad with BAR (US Army).
Another squad of 9 with BAR and NCO with "SMG". This squad was made using the US army kit not the Airborne kit. I gave the NCO the shotgun as a 'counts as' SMG because the model seemed cool and is included in that kit. I envisioned these guys as being US army who are coming to relieve the airborne units but for all intents and purposes they are identical to the airborne squads above.

Medium Machine Gun Squad (Airborne).
Once again I made this as per the Band of Brothers starter kit. I've decided to make all men prone for this team as I don't like having prone figures in the infantry squads with so many men running - it seemed too out of place for me. I've modelled some gear on the ground of the big base as if the team have flung their things down in haste to set up the gun. I also decided to keep the third man on his own base for easy removal when taking casualties and be able to use him as an air/artillery observer if needed.

Ranger/Veteran Squad (US Army).
I had 5 bodies left over from the US army sprues and decided to make a small veteran/ranger squad. The squad has NCO with SMG, 2 SMG Grease guns from the US infantry sprue, a BAR and a rifle. I wanted each guy in this squad to look a bit unique so I used a collection of smoking heads/hands, the mohawk from the airborne kit and the head with the glasses. In the future I might expand this squad with 2 or 3 more riflemen for my 'US Army' army.

Engineer Squad (with flamethrower).
For this squad I wanted to have a group to represent combat engineers. I used the bag from the US army sprue and a spare bazooka ammo arm to represent satchel charges/explosives. The flamer is made from a modified grease gun with panzerfaust charge, a paperclip tubing and a flamer tank from the 40K Imperial Guard sprue. I painted the flamer with the US army colours rather than the Airborne as the idea of parachuting with a flamethrower seemed too crazy. The flamer can be run as a 2 man flamer team (I would use a spare US army model) or as part of this squad for extra flexibility.

Bazooka Team (Airborne)
This bazooka team was an easy conversion using the Bazooka team arms from the US infantry sprue on Airborne bodies. I wanted to capture the scene of the Bazooka to be in afiring position with the ammo carrier rushing up hunched over from the heavy ammunition.

Mortar Team with Spotter (Airborne)
This mortar team was made entirely with leftover plastic infantry bits. The spotter is Airborne with the airborne binoculars and the radio on his back is an ammo tin + handle for an e-tool as the antenna. He can also double as an artillery/air observer. The crouching crew member is holding a trimmed bazooka shell. The crew member looking at the map is made using the German grenadier map arm and cigarette. The prone loader is made using the machinegun team arms.
The mortar itself was made using a spare bazooka as the barrel, the bipod was made from an MG42 barrel and two barrels from the LMG in the airborne kits and the base plate is the lid of the 30.cal ammo box. I'm really happy with this conversion and on the table it looks the real deal without having to use those pesky metal models.

57mm Anti Tank Gun (Airborne)
This is the metal warlord kit which I bought online. It was an absolute dog to put the gun together with bad instructions and fiddly parts. I would never recommend this kit to anyone. I've placed the gun on its own base and the crew separate for storage reasons and for easy casualty removal. The crew were painted to match the rest of the army though I believe their uniforms are slightly different to the plastic Airborne models. I also used milliput on the crew bases to hide the garish metal bases they come on. Once together and all painted I'm happy with how the gun looks but having built the Rubicon plastic Pak40 I just can't accept this Warlord kit!

M8 light armored car
This is the Rubicon M8 Greyhound/ M20 scout car kit and, like all rubicon kits, was an absolute dream to put together. A very high quality kit and would recommend to anyone. I decided to go with the mine rack on the sides rather than the storage bins and I liked the 'Cowboy' decal included in the rubicon kit. The paint job was an easy spray of Olive drab and then washed with nuln oil and weathered. The antenna are broom bristles stuck down with superglue. I had a lot of fun researching this vehicle and looking at reference photos to get an idea for stowage and paint.

M4 Sherman
This is another Rubicon kit the 'M4 Sherman/Firefly IC'. The kit is awesome giving plenty of options for Sherman variants and the firefly. I had to reach out to the bolt action discord to make sure I was choosing a hull and gun which was consistent with the Sherman's they had during Operation Overlord.I used the left over parts from the kit to make my Sherman wreck terrain piece which I posted a few weeks ago. I'm yet to use this in a game and the model has only made an appearance as a terrain piece so far but I am keen to give it a spin. I chose the 'Trooper' name from the decals included in the kit and I used a technique from Youtuber 'Night Shift' to do the painting and weathering. As I don't have an airbrush all of my models are brush painted.
That's the army so far! It's been a great experience researching the battles and war and building an army to fit into the theme for late war Western Europe. I still have a few things to build and add to the army namely another squad of US Airborne, another squad of US army, an M3 Stuart and a US Airborne Jeep. Once those are done I think the army will be 'done' until I get another spark of inspiration!
Signing out,
Chewie


No comments:
Post a Comment