Sunday, May 28, 2023

Painting: SS Autumn Oak Leaf Camo

As an opposing side to my British Airborne I am making an SS force based around late 1944 Market Garden(ish) period. So far it has been fun doing the research and putting together the units and one thing that struck me was the interesting camouflage schemes used by the SS in the late war to blend into their surroundings. One of the most distinctive and iconic designs was the German Oakleaf Autumn Camouflage, characterised by its unique combination of dark brown and orange. This is a painting guide for my take on the iconic look.

Two German soldiers wear Autumn Leaf Camouflage smocks


Step 1: Applying the Base Coat. Start by applying a base coat to your miniature using a light, earthy tone, such as a mix of brown and green. I used Vallejo Beige Brown. This will serve as the foundation for your camouflage pattern. 


Step 2: Creating Dark Splotches. Using a small, fine-tipped brush and a darker shade of brown or green, apply irregularly shaped splotches onto the base coat. I used a 1:1 mix of Vallejo Flat Brown and Negro Black. These splotches should be random in size and placement, mimicking the patterns found in natural foliage. . Remember to keep the splotches relatively small and well-distributed to achieve a balanced and realistic effect. 


Step 3: Adding Orange Dots. To mimic the fallen autumn leaves, take an orange paint and create tiny dots on top of the dark splotches. These dots should be sporadic and irregular in shape and size. Use a small brush or even the tip of a toothpick to achieve precise and delicate dots. The orange color will provide a striking contrast against the darker background, capturing the essence of the autumn foliage. For this step I used Citadel Squig Orange.


Step 4: Applying Final Dark Splotches Now, return to the dark brown or green paint and carefully apply additional splotches over the orange dots and surrounding areas. This step helps to further blend and integrate the orange dots into the camouflage pattern, giving it a cohesive and realistic appearance. The final dark splotches should overlap slightly with the existing ones, creating a sense of depth and complexity.I then washed the model with Citadel Agrax Earthshade and filled in the other details.


I am by no means a great painter but I think it looks the part especially when the models will be viewed from arms length away on a gaming table! The process is rather time consuming and it is taking me some time to get through all the miniatures but when they are together in a squad they look quite striking (in my opinion!). Of course there were many different camouflage schemes during the war and this is serves as a guide of how I am doing mine. I will no doubt experiment with the look as this project goes on!


I hope other people find this guide helpful and use it as inspiration for their own hobby!


Signing out,

Chewie

Saturday, April 22, 2023

Battle Report: Two-Way Man hunt!

The Paratroopers advance behind the rubble
 The cold morning air hung over the small town in Eastern France, as the German scouting party made their way towards the center square. The commanding officer, Hauptmann Schmidt, ordered his men to fan out and secure the area. Unknown to him, a small American Airborne party was also on a reconnaissance mission, lurking on the outskirts of the town. As the Germans reached the square, they noticed a small group of American paratroopers approaching from the opposite end of town. Both officers simultaneously gave orders to their men to capture the enemy officers alive. A classic case of the two-way man hunt!

A fierce melee erupts in the streets!


The Americans advanced towards the center of town, using the rubble of the bombed out buildings as cover. Fire from the German machine guns proved effective and cut down a few men as they advanced forward but their resolve held and they advanced towards their enemy. Schmidt snapped his men to action and they too advanced over the hedgerow of the nearby farms and into the city streets, hell bent on capturing the US Captain.

The two sides continued to close in on each other until the German troops opened fire on the American paratroopers with a hail of bullets. The paratroopers, caught off guard, dived for cover behind nearby buildings and returned fire. The narrow streets of the town quickly become a bloodbath as the two sides engaged in a fierce melee, with bullets ricocheting off walls and grenades exploding in alleyways.

The greyhound leads the charge for the US flank.
As the melee raged on, the sound of an M8 Greyhound's engine could be heard coming up the road. The American paratroopers breathed a sigh of relief as the Greyhound's 37mm cannon quickly eliminated a few German soldiers who were hiding behind a wall. However, their moment of calm was short-lived as a Puma armored car opened fire from across the village, and a round struck a nearby building causing it to explode. The Greyhound driver frantically maneuvered to avoid further hits.The surviving German soldiers then rallied and charged into some American soldiers, who were caught off-guard and quickly overwhelmed. The Germans mercilessly stabbed the Americans with their bayonets until the last one fell, leaving the German soldiers in control of the area.

American Machine gun team fires across the field
Meanwhile on the Western flank, the German grenadiers advanced backed by their Puma Armored car. They quickly took down the US bazooka team and advanced across the field to drive the American troops out of a nearby crater. The American machine gun team, positioned in the field of a nearby farmhouse, saw the German troops attempting to flee to the cover the crater. The gunner unleashed a hail of bullets, forcing the Germans to dive for cover behind the small ridge of the crater.
The gunner adjusted his aim, and the next burst of fire found its mark, taking out two German soldiers attempting to flank the American position. The rest of the German troops were pinned down, unable to move from their position, as the American machine gun team continued to pour fire on them.

The tension in the air was palpable as the two groups closed in on each other. Suddenly, the American officer, Captain Thompson, spotted the German officer's attendant in his peripheral vision. Without hesitation, he raised his rifle and fired a shot, hitting the attendant square in the chest. The German officer was momentarily stunned, giving the American paratroopers outside his building the opportunity they needed to rush into the building and capture him.

Overpowered, Schmidt has no choice but to surrender.

Despite the Germans' efforts to resist, they were no match for the highly trained American paratroopers. The Germans were quickly subdued, and the American officer emerged from the building with his captive in tow.

It was a small victory in the grand scheme of the war, but a critical one nonetheless. The successful capture of the German officer would undoubtedly provide valuable intelligence for the Allies, and perhaps even turn the tide of the war in their favour.


This one was so close that I kept forgetting to take pictures of the action as the tide of battle swung back and forth between the two sides! The US command teams shots onto the German attendant required 6's to hit and my opponent was lucky enough to roll 2 6's to take him out and pin down my officer! The mission was a fun one with simple rules and having higher ranked officers leading our forces gave us the tough decision of leaving the officer back to avoid harm or sending them forward to support the troops and take advantage of those Snap-to's! Another gripping game of bolt action!

Signing off,

Chewie

Saturday, March 25, 2023

Battle Report: Assault on the Flak Battery


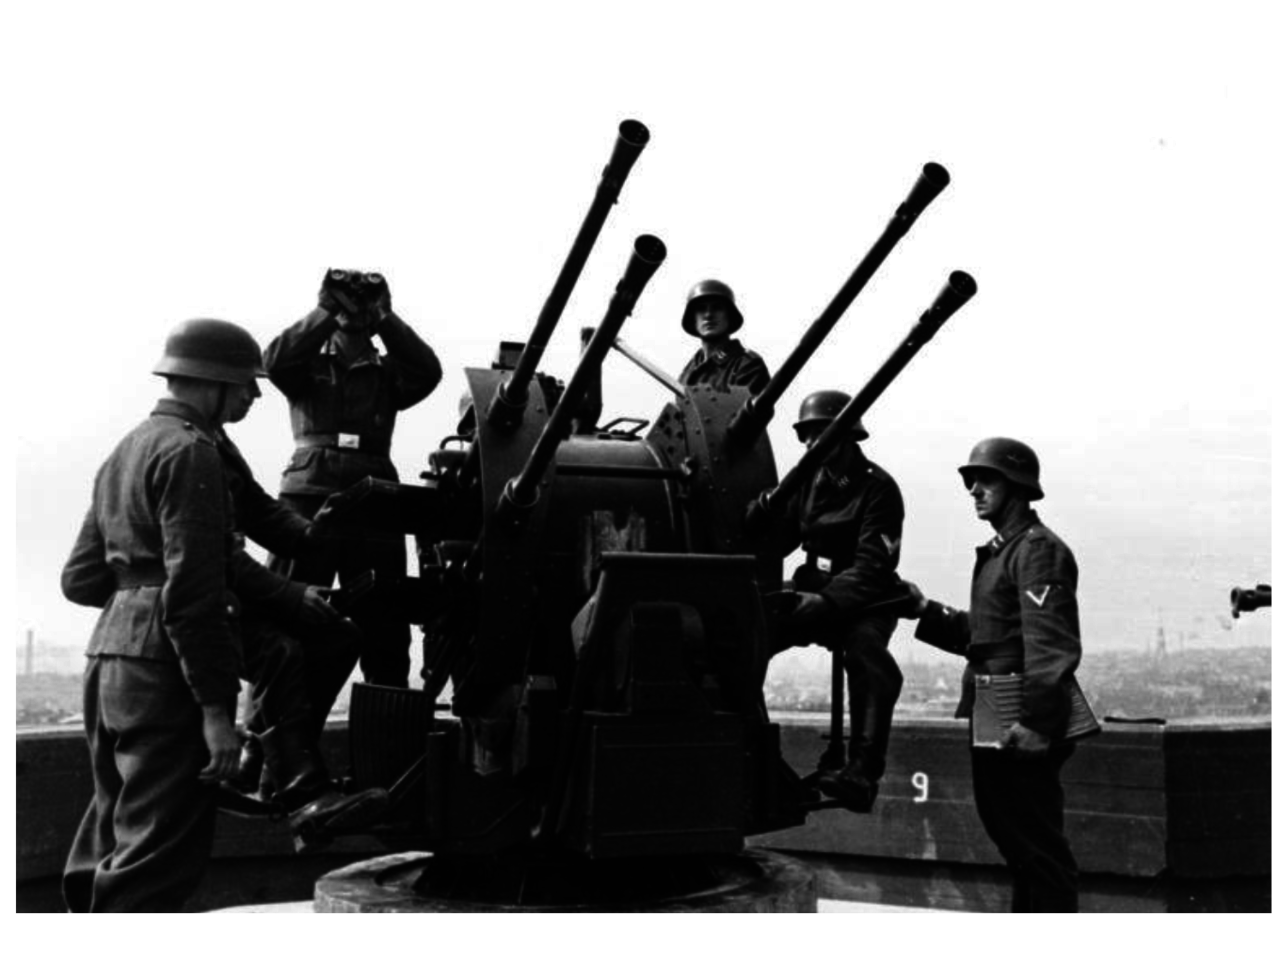
The mighty Flakvierling 38 looks out over the battlefield.

September 1944 - Somewhere near Eindhoven. It was a hot and muggy morning as the British Paratroopers prepared to launch their assault on the German flak gun position. The objective was to take out the enemy gun, which had been causing havoc for the allied air forces. The paratroopers, led by 1st Lieutenant Jameson, had been scattered behind enemy lines and had been moving through the forest and farmland towards their objective.


Paratroopers organise and advance under
the command of 1st Lieutenant Jameson
As they approached the enemy position, they came under heavy fire from luftwaffe soldiers positioned at the flak gun battery. The paratroopers quickly took cover behind nearby trees and returned fire with their Lee-Enfield rifles. The sound of gunfire echoed through the forest as the two sides engaged in a fierce firefight.

Captain Jameson quickly assessed the situation and ordered his men to flank the enemy position. The paratroopers split into two groups, with one group providing covering fire using the 50. cal mounted on a jeep, while the other moved to the side of the enemy position. The Germans, spotted the paratroopers moving towards their flank and killed all but the lone sergeant in a hail of 20mm Flak fire!

The paratroopers charge the Luftwaffe infantry.
As the covering fire intensified, the paratroopers in the centre rushed forward, bayonets fixed on their rifles with a powerful cry of "Woaaahh Mohammad!". The Luftwaffe troops, caught off guard, tried to bring their rifles to bear. But it was too late. The paratroopers were upon them, firing their rifles and stabbing with their bayonets.

The Germans fought back fiercely, but the paratroopers were too close and too determined. In a matter of minutes, the enemy positions were taken. Lieutenant Jameson ordered his men to continue their advance and the troopers quickly took cover in a wheat field just 50 yards away from the Flak gun.

The PIAT team advances towards the dug in Flak gun
As the paratroopers secured the position, a team of soldiers equipped with PIAT slowly and stealthily made their towards the Flak gun using a wrecked Panzer IV as cover. As they reached a point just a few meters from the gun, Private Baker redied his weapon, took a deep breath, and fired. The explosive charge from the PIAT struck the sandbags protecting the gun and Baker and his loader were instantly cut down in a volley of rifle and MG42 fire! The Flak gun swung around and began to take aim on the paratroopers in the field.


The Flakveirling fires into the
advancing paratroopers.
As the gun fired out into the field the Paratroopers hit the deck and amazingly only a few were wounded in the vicious volley of explosive shells. Rallied by the presence of Lieutenant Jameson they stood up, readied their bayonets and filled the air with a cry as they descended onto gun emplacement. The vicious melee which broke out lasted only a few moments as the gun crew were slain and the gun destroyed with a well placed explosive charge. 


The British paratroopers had accomplished their mission as the remaining germans scattered towards the nearby town. They had silenced the enemy flak gun and secured an important strategic position. But the victory had come at a cost. Several paratroopers had been killed in the intense firefight.

The gun is overun and destroyed by the paratroopers. Their mission is complete!

As they waited for more airborne troops to land, the paratroopers looked out over the quiet fields, thinking about the sacrifices they had made and the lives lost in the pursuit of victory. But they also knew that their efforts had helped to bring them one step closer to ending the war and bringing peace to Europe.

Another cracker of a game! I was a bit worried how balanced the scenario would be given that I had just made it up and this was our first time play testing but it seemed to go quite well. The gun not being able to fire without drawing its specific dice was a nice touch which let the British player take some risks with the order of activations as the German player couldn't rely on when the gun would fire. 

The gun was definitely powerful and while it had some terrible rolls (didn't blow up a jeep and barely killed any paratroopers in the field) when it did connect with the squad on the flank it easily killed the entire squad bar 1 man!

I would play this scenario again and perhaps increase the points to 1000 and add two guns! So all in all I would say this was a great success! 

Signing out,

Chewie.

Wednesday, March 8, 2023

Scenario: Assault on the Flak Battery

Missing our Normandy campaign and in anticipation for a future Market Garden campaign I have decided to have another crack at making a fun scenario to scratch the itch and give me a great excuse to field my new Flakvierling 38!

The scenario is named "Assault on the Flak Battery" and is an attacker and defender scenario played on a 4'x4' board. 


German Flugzeugabwehrkanone (Flak) 38


SCENARIO: ASSAULT ON THE FLAK BATTERY

Background: September 17th 1944:  British 1st Airborne Division have been dropped into multiple towns across the Netherlands as part of the allies bold plan Operation Market Garden. Blown off course by fierce flak fire a group of paratroopers find themselves far from their LZ and objectives. Rallied together by a daring 1st Lieutenant the hastily organised forces spot a German Flak gun firing wildly into the sky. The Brits spring to action with a plan to silence the gun and give their boys in the sky a chance at coming in safe!

FORCES:

British 1st Airborne:

First Lieutenant and man with SMGs. (Veteran)

Paratroop Section (Veteran)
4 Infantry with rifles
1 Infantry with SMG
1 NCO with SMG

Paratroop Section (Veteran)
4 Infantry with rifles
1 Infantry with SMG
1 NCO with SMG

Paratroop Section (Veteran)
4 Infantry with rifles
1 Infantry with LMG (Requires loader)
1 NCO with SMG

PIAT Team (Veteran)

Jeep (Veteran)
Pintle-mounted MMG.


176th Luftwaffe Flak Division:

Second Lieutenant and man with SMGs. (Regular)

Luftwaffe Defence Squad (Regular)*
4 Infantry with rifles
1 NCO with SMG
1 man has Panzerfause in addition to other weapons.

Luftwaffe Defence Squad (Regular)*
4 Infantry with rifles
1 NCO with SMG
1 man has Panzerfause in addition to other weapons.

Heer Grenadier Squad (Regular)
3 Infantry with rifles
1 Infantry with Assault rifle
1 NCO with SMG

Heer Grenadier Squad (Regular)
3 Infantry with rifles
1 Infantry with Assault rifle
1 NCO with SMG

Medium Machine Gun Team (Regular)

20mm Flakvierling 38 (Regular)
Gun Shield

*These squads have the Shirkers special rule.

SET-UP

The Flak gun should be placed in an entrenched position in the centre 6" from the defenders edge. The terrain leading to the flak gun should be a mixture of soft and hard cover with many of line of sight blocking elements.

The defender sets up at most half of his units (rounding down and including the gun) 12" from his table edge. Units that are not set up to start with are left in reserve. The attacker's units are not set up on the table at the start of the game. The attacker must nominate at least half of his force to form his first wave. This can be the entire army if he wishes. Any unit not included in the first wave is left in reserve.

Reserves are allowed to outflank in this scenario.

SPECIAL RULES:

Keep that Flak firing!
The Flak gun is too busy firing into the sky and is unable to fire at ground targets in the first turn. In addition, the order dice for the Flak gun should be  a separate colour from the defender and attacker order dice. The Flak gun can only activate when this specific order dice is drawn.

Well Crewed
The Flak gun has 1 extra crew member from what is noted in Armies of Germany book.

OBJECTIVE:

The attacker must try and silence the Flak gun. To silence the gun all of the gun crew must be killed or routed.

PREPARATORY BOMBARDMENT:

As this strike is carried deep behind enemy lines there is no preparatory barrage used in this scenario. 

FIRST TURN:

The battle begins. During turn 1, the attacker must move his entire first wave onto the table. These units can enter the table from any point on the attackers table edge, and must be given either a run or advance order. Note that no order test is required to move units on the table as part of the first wave. 

GAME DURTAION:

Keep a count of how many turns have elapsed as the game is played. At the end of turn 6, roll a die. On a result of 1,2 or 3 the game ends, on a roll of 4,5 or 6 play one further final turn. 

VICTORY:

As soon as all the crew are destroyed or routed then the game ends and the attacker wins.
At the end of the final turn, if the Flak gun still has at least 1 crew member, then the defenders win. 

I'm very keen to play this out and I think it could be a bit of fun. The theme could easily be extended to any other airborne invasion in WWII (Normandy, Crete, Sicily) with only some minor tweaking and expanded to say 1000 points (perhaps even two guns or a whole battery!). I'm looking forward to a great game and I hope the scenario can inspire others to design their own or improve and expand on this one!

Signing off,

Chewie


Thursday, February 23, 2023

Terrain Piece: Rubble Piles

Whilst looking at some photos from various WWII battles I was struck by the seas of bricks and rubble that the soldiers seemed to find themselves fighting through. Stories from Stalingrad and Caen described how the bombed out cities resulted in clogged streets of rubble often times taller than a man.

World War II: The Eastern Front - The Atlantic
Soviet soldiers take cover in piles of rubble from blasted buildings while engaging German forces in street fighting on the outskirts of Stalingrad 1943  


Inspired by these photos and stories I decided to try my hand at making some rubble piles for my Bolt Action gaming board. I got the glue, paint and cardboard out and decided to document my process for other gamers to give a try using my recipe! I was going for something (1) quick and (2) easy with the build and overall am very happy with how it turned out:


Step 1: 

Using regular cardboard (literally from a case of beer) I cut the rough shape for our pile of rubble. I didn't want a perfectly regular circle or rectangle so I went with a rounded oval.


Step 2:

Next I crinkled a handful of kitchen paper into a ball and places it onto the centre of the cardboard base. I then covered the entire paper-ball-mound with PVA and water (75:25 ratio) and left it to dry.


Step 3:

Once dry and hardened up, the entire base and mound was covered PVA and then in sand. This is the sand I use for basing and is sand I took from a local park.


Step 4:

Next I began by cutting up old sprues into shapes for bricks, scaffolding, wooden beams and other detritus of bombed out buildings. I threw in some random left over bits I had from various kits. Wall pieces from the Warlord farm house, some tires from old rubicon kits and random stowage bits.


I also bought a bag of these MDF cut "Bag of bricks" sold by Battle Kiwi a New Zealand based company. I think I got it for ~$10 AUD and it has enough bricks for plenty of terrain and basing projects.


I glued the bricks and sprue rubble down using PVA glue again.


Step 5: 

The entire piece was sprayed with a grey primer. Just regular cheapo hardware store grey paint.


Step 6:

Finally I painted the bricks shades of grey, brown and orange to break up the colours a bit. Various sprues were painted with either flat brown, flat earth or boltgun metallics. Then entire thing was washed in GW's agrax earthshade for a bit of shading. Finished!

I made a bunch of different shapes and sizes for some variety scatter terrain in our bolt action games. Here's a few shots of them in action:

The US Sherman is halted by rubble on the roads.


US machine gun team sets up behind the cover of debris.

Sturmpioniere advance over the rubble whilst taking fire.


Overall I am very happy with how they turned out and this has been a full little project. I imagine this recipe could easily be used for other tabletop war games like 40K or infinity - just throw some sci-fi bits into the rubble! I hope this guide serves as inspiration to other players out there looking for some cheap and easy scatter terrain.

Signing out,

Chewie


Monday, January 16, 2023

Scenario: Destroy the Supplies

I've tried my hand at making a new scenario for bolt action. The scenario is named 'Destroy the supplies" and is an attacker and defender scenario played on a 4'x4' board. 

British Commando's conduct a raid deep behind enemy lines on the island of Vågsøy, Norway 1941.

SCENARIO: DESTROY THE SUPPLIES

A strike force has been sent behind enemy lines to destroy key objectives, disrupting supply chains and wreaking havoc in the rear echelons. The defenders must quickly react and protect the key objectives.

SET-UP

5 objectives are placed on the board in a 'Z' shape position (See map). These objectives should be tactically important supplies such as an ammo dump, fuel reserve or command post.

The defender picks a side of the table and sets up at most half of his units (rounding down) in the set up area (See map). Units that are not set up to start with are left in reserve. The attacker's units are not set up on the table at the start of the game. The attacker must nominate at least half of his force to form his first wave. This can be the entire army if he wishes. Any unit not included in the first wave is left in reserve.

Reserves are not allowed to outflank in this scenario.

OBJECTIVE:

The attacker must try and destroy all of the objectives on the map. To destroy an objective an infantry or vehicle unit must be given a successful fire order while within 2" of the objective. This order cannot be used to fire at any unit and instead results in the destruction of the objective. Single shot weapons such as panzerfausts are not expended for this fire order.

PREPARATORY BOMBARDMENT:

As this strike is carried deep behind enemy lines there is no preparatory barrage used in this scenario. 

FIRST TURN:

The battle begins. During turn 1, the attacker must move his entire first wave onto the table. These units can enter the table from any point on the attackers table edge, and must be given either a run or advance order. Note that no order test is required to move units on the table as part of the first wave. 

GAME DURTAION:

Keep a count of how many turns have elapsed as the game is played. At the end of turn 6, roll a die. On a result of 1,2 or 3 the game ends, on a roll of 4,5 or 6 play one further final turn. 

VICTORY:

At the end of the game calculate which side has won by adding up victory points as follows. The attacker scores 2 victory points for each objective destroyed. He also scores 1 victory point for every 2 enemy units destroyed. The defender scores 2 victory points for every objective which has not been destroyed. He also scores 1 victory point for every 2 enemy units destroyed.

Map: Scenario - Destroy the supplies.

I imagine this scenario is better suited for smaller battles of <1000pts but perhaps it could be expanded to larger forces. I think a few thematic scenes would really suit this scenario such as an SAS raid in the deep desert, a glider assault dropping men to destroy artillery guns, a strike force sent to capture officers/POWS or a strike to capture fuel reserves vital for an offensive campaign! It would suit many theatres and points throughout the war. I also have no idea if this is balanced or not and will be planning to play this scenario this week so will probably make a follow up post on how it goes. I imagine some extra cheesey lists could be cooked up to rush and capture all the objectives in the second turn but I'm very much a 'beer and pretzels' player so that's not the spirit of the game I'm going for with this - I want something cinematic and fun!

I hope this can inspire other players and lead to some fun games of bolt action.

Signing off,

Chewie.

Wednesday, January 4, 2023

Kit Bash: British Airborne 6pdr Gun

Over the Xmas break I've been busy with my British airborne project and have continued on my quest to replace all metal models with plastic conversions. Next up on my list was a 6pdr gun with the aim of both converting the crew and making a scenic base for the gun. 

British airborne troops with a 6-pdr anti-tank gun in Hamminkeln, Germany 1945

I was inspired by the many 'diorama' bases I've seen online that people make for their artillery pieces and wanted to try my hand at something similar. I started with a 9.5cm X 8.0cm piece of plastic card as the foundation and positioned where I wanted the gun and crew to be on the base. I then built up some ground and dirt using milliput. I also left some spaces for bases of the crew so they can be removed as casualties easily while playing. 
WIP of the gun and base. This is my second time making a metal 6pdr and it was still an absolute dog of a model to put together.

Everything was then covered in PVA and sand and then spray painted and painted up just like the bases on my usual British airborne infantry. I was aiming for a look that was on the edge of a city. Maybe on the outskirts of Arnhem firing into the German counter attack? I made the shrubs from tissue paper soaked in PVA and water then covered them in flock.The ammo boxes and shells all came with the gun. 

The finished diorama base.

Next up was the crew. In bolt action 6pdr guns have a crew of three but nearly every photo I've seen on them has at least 4 people working around the gun so not sure what is correct. The conversions were extremely simple and I think they have effectively represent a gun crew.

The gunner

First up was the gunner. This was a simple conversion that only used British airborne parts. The right arm is the arm holding the Sten gun with the gun clipped off and the left arm is direct from the airborne sprue. I imagine he is looking down the sight and ready to fire.


The loader

The loader was another simple conversion. All British airborne parts with the shell taken from the Rubicon Pak40 plastic kit (a dreamy kit compared to the metal warlord one!). The right hand is actually a left hand but you can't really tell when its all on the table haha!


The spotter

Finally is the spotter. This model was made from British airborne parts and Waffen SS bits. The left arm is from the SS sprue and the right hand holding binoculars is from the German Grenadier sprue. I imagine he is about to bring down his arm and yell "FIRE!".


Here is the final product all together:


Overall I'm very happy with how it all turned out. I think I've captured a dynamic scene of the crew frantically loading the gun while under attack. I was a little dubious about the diorama bases as while they look great, they aren't the best for gameplay and moving pieces around terrain. I decided with it anyway as models are on the display case 99% of the time and the gaming table 1% so net worth it in the end.

Looking forward to another year of Bolt Action and hobby fun!

Singing off,

Chewie


Battle Report: Forward Operating Posts in Western France

The evening of 9 June 1944 settled uneasily over the Norman countryside, with the fading light casting long shadows across the hedgerows and...